This project is for newbie who wants to use ESP32 development boards. This is a simple project to understand the working of physical push button and getting a notification on you smartphone. It will be ESP32 based Switch Notification Project using Blynk.
In this project will be build using minimal components and approach step by step. We will be using ESP32 development board and connect it with Blynk app. Lets quickly see in detail how to build this project.
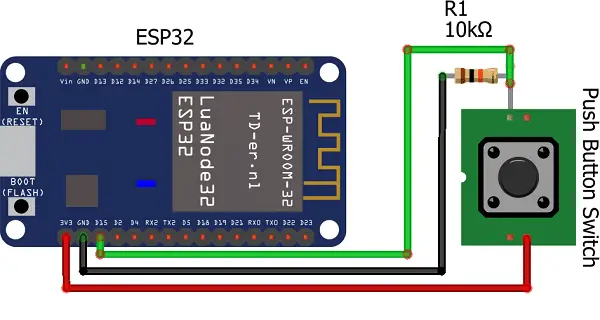
Components Required
- ESP32 (BEST BUY) x 1
- Push button Switch x 1
- Resistor 10KΩ x 1
- Some Jumper cables
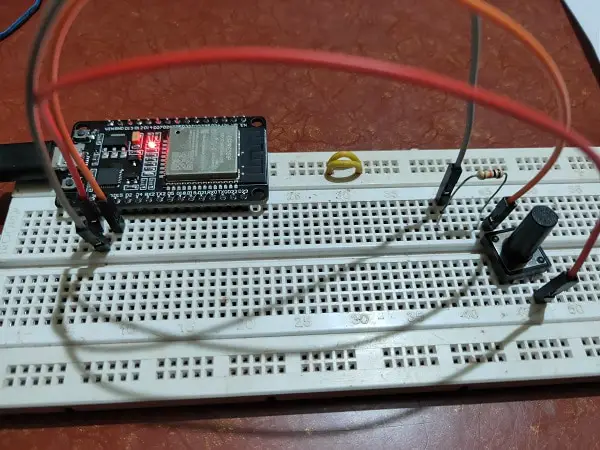
Circuit Diagram
With the help of above components you can assemble it on a breadboard.
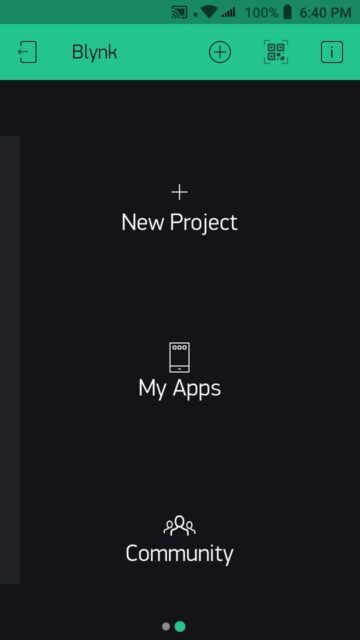
Creating a Blynk Project
You can download the Blynk App from below links
Let us see how to setup the blynk app
Open the app and click on New Project
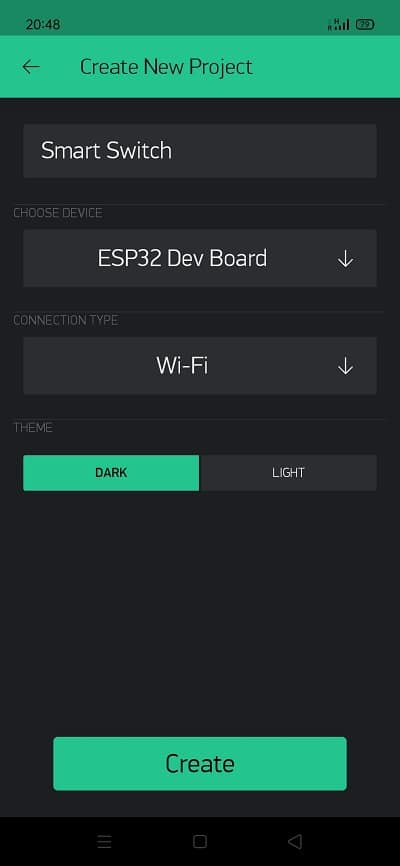
Provide a Name for you project, select ESP32 Dev board and tap on Create
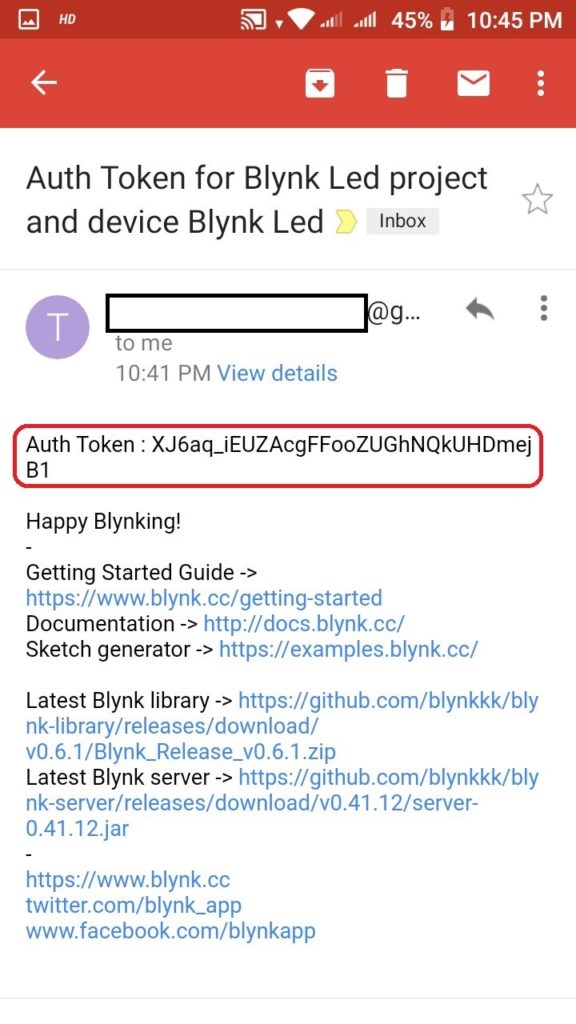
An email with Auth Token will be sent to your registered email address. Tap on OK
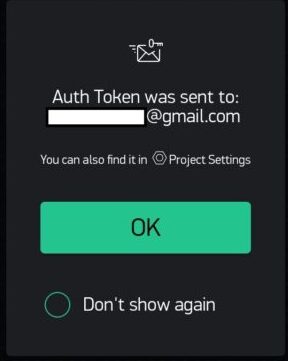
The mail will contain Auth Token
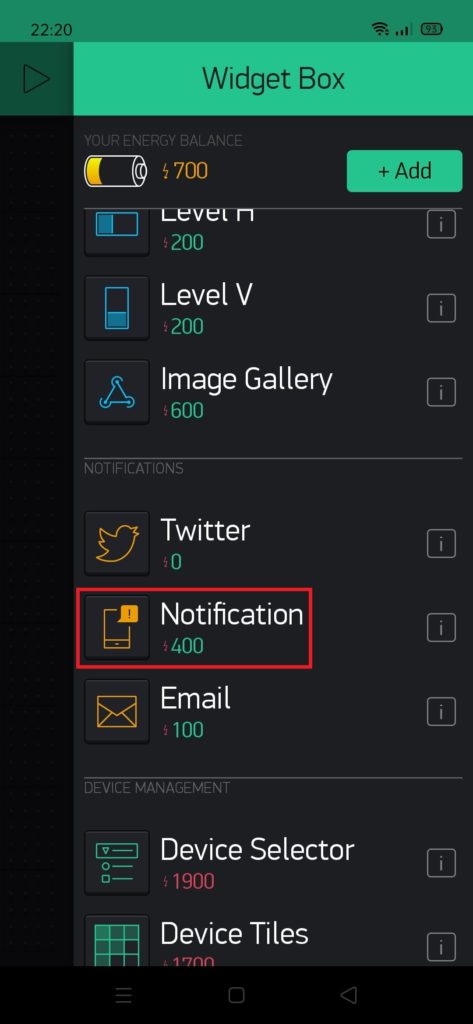
Tap on the below icon to add a widget

Select Notification widget from the list
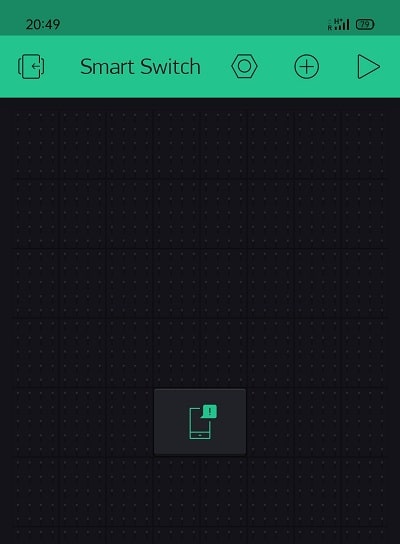
And finally its done. It will look like
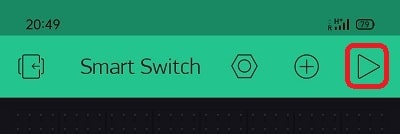
Tap on the play button to start the project
Code
You can copy paste the code in your Arduino IDE to compile and upload it. You can also download the code from here.
Must Read: Uploading code in ESP32
#include <WiFi.h>
#include <BlynkSimpleEsp32.h>

#define switch 15

const char* ssid = "SSID" // Enter your Wifi name
const char* password = "Password" // Enter wifi password
char auth[] = "Auth Token" // Enter the Auth Token provied by Blynk app

void setup()
{
Serial.begin(9600);
pinMode(switch,INPUT);
Blynk.begin(auth, ssid, password);
}

void loop() // put your main code here, to run repeatedly
{
Blynk.run();
if(digitalRead(switch) == HIGH)
{
Serial.println("Send Notification to Blynk");
Blynk.notify("Switch Pressed"); // This notification will be sent to Blynk App
}
}

Recommended Projects:
- Interfacing LM35 Temp Sensor with Arduino
- NodeMCU ESP8266 IoT based LPG Gas Leakage Alarm
- PIR based Motion Switch | PIR Sensor Light
- Smart Switch using Blynk | IoT Based WIFI Switch
How Code works?
The code has simple and easy to understand. The headers are mentioned at the beginning.
#include <WiFi.h>
#include <BlynkSimpleEsp32.h>
Then we have defined the switch is connected to which GPIO pin of ESP32
#define switch 15
Then we have the network configuration code which will help us to connect the ESP32 with local network and send the data to blynk server using Auth Token
const char* ssid = "SSID" // Enter your Wifi name
const char* password = "Password" // Enter wifi password
char auth[] = "Auth Token" // Enter the Auth Token provied by Blynk app
Next we have the setup section. Here we are configuring Serial Print baud rate, along with declaring pinmode to be input as we will be taking input conditions when the switch will be pressed. We will also initialize the blynk.
Serial.begin(9600);
pinMode(switch,INPUT);
Blynk.begin(auth, ssid, password);
Lastly we have the loop, where all the actual condition is checked and required action is taken. There is a “IF condition” which checks the status of the physical switch. Once the switch is pressed, a notification is sent to Blynk app.
Blynk.run();
if(digitalRead(switch) == HIGH)
{
Serial.println("Send Notification to Blynk");
Blynk.notify("Switch Pressed"); // This notification will be sent to Blynk App
}
Connection and Testing
Once you set up the components as per the diagram and upload the code then the magic begins. If your connection is correct then once you press the switch, a notification will appear on your smartphone. This project can be further modified by adding some simple component.
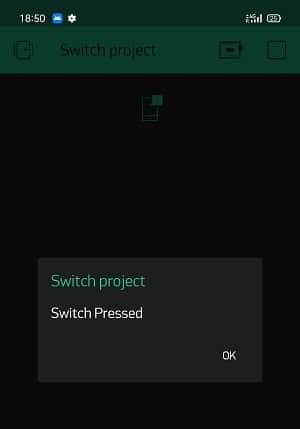
Once the switch is press you will receive below notification
You can use this project for below conditions
- Door bell notification
- To know the status of Physical switch
- Trigger the switch and get acknowledgement
Conclusion
ESP32 based Switch Notification Project using Blynk is simple and informative project. You can change or modify the project as per your need. By adding some more components and sensors it can made more advance. Also this can be used in real time as well. Please comment how you made this project and what modification you did to try something new.
How if i have 5 switch with arduino uno?
5 switch, arduino uno and esp 8266
Why to use arduino as well as ESP8266 together? Make you project simple not complicated.
Use single board and you can use 5 switches, especially NodeMCU.
Hi, to to add timer to get notification at specific time if Switch is HIGH