Monitoring Weather Data using BMP280 and Blynk 2.0
Monitoring weather data is an important part of meteorology. Weather data is used to monitor the atmosphere, to forecast weather conditions and to monitor climate change. Meteorologists use a variety of weather data to make predictions. So we came up with an idea of building a small weather station which will be monitoring weather data using BMP280 and Blynk 2.0 app and over web dashboard.
Weather data can be collected from a variety of sources. Air pollution data can be used to monitor air quality. Satellite data can be used to monitor climate change. Weather data can also be collected from weather stations, which are located all over the world.
Weather data is used to make predictions about the weather. A meteorologist can use past data to make predictions about the weather in the future. Meteorologists can also use data to make forecasts. A forecast is a prediction about the weather in the future. A meteorologist can make a forecast about the weather for a specific location or for a entire country. Scientists use weather data to monitor the atmosphere. The atmosphere is the layer of the Earth that contains air.
Parts List
For building this project you need below items.
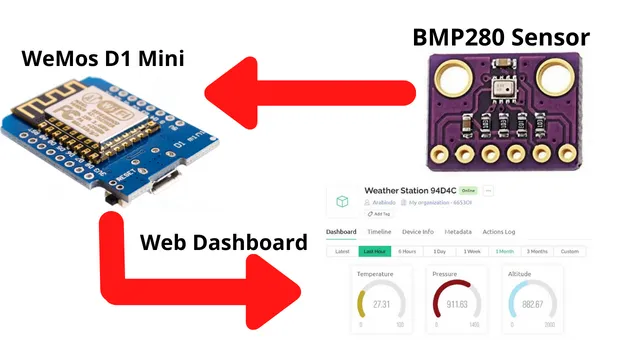
- WeMos D1 Mini x 1
- BMP280 Sensor x 1
- Jumper Cables
- Laptop and Data cable
BMP 280 Sensor
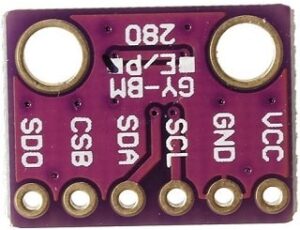
BMP280 is a small and powerful sensor that has been designed specifically for small devices. One of the key features of the BMP280 is its ability to measure temperature, pressure and altitude. This makes it ideal for applications such as security and surveillance, as well as environmental monitoring. Another advantage of the BMP280 is its low price point. This makes it a suitable option for a wide range of applications, including consumer devices and embedded systems.
Working
The data will be collected by BMP280 sensor and sent to WeMOS D1 Mini which is a ESP8266 based development board. This development board will send the data to Blynk cloud servers which will be displayed in web dashboard and in Blynk mobile app.
Connection
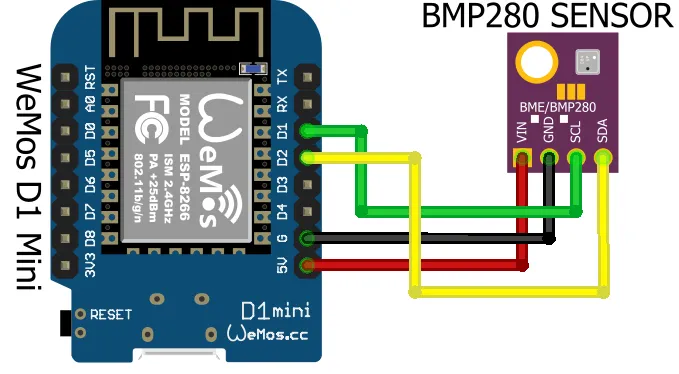
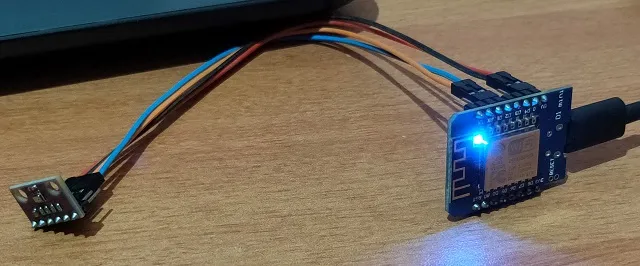
Connect the sensor with WeMos D1 mini module as shown below.
Blynk 2.0 Configuration
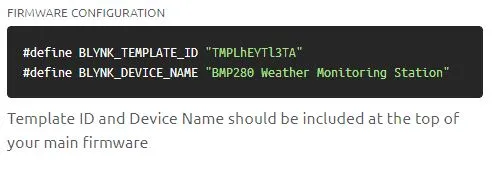
Log in to your Blynk account and click on a new template.

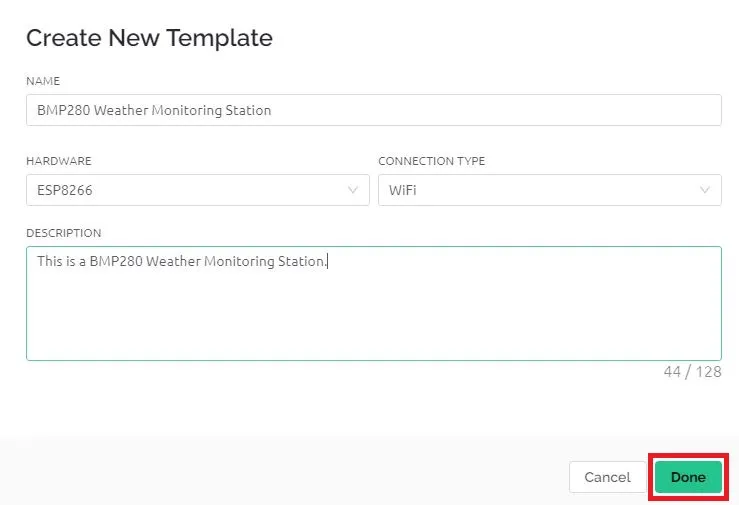
Add details for your New Template and click on Done.
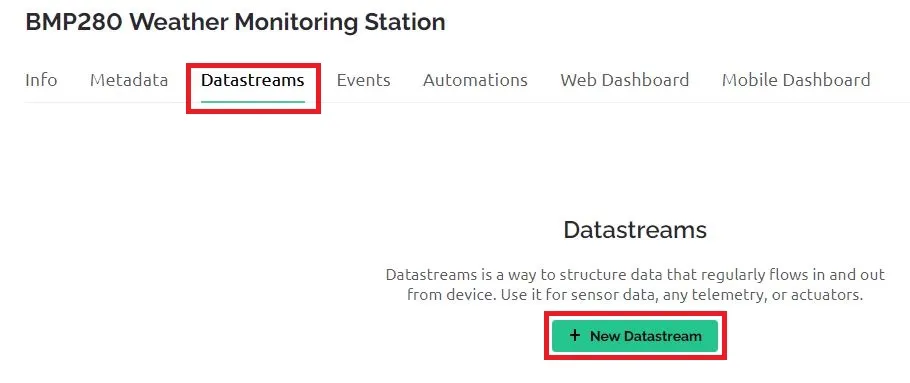
Now click on Datastreams and click on New Datastreams
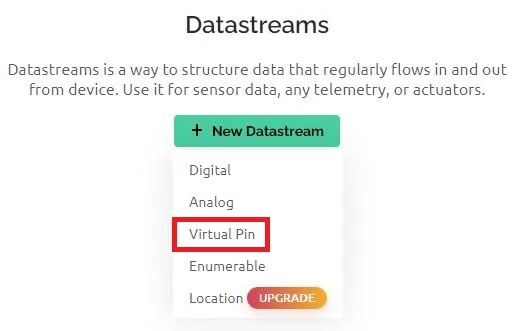
Select Virtual Pin and proceed.
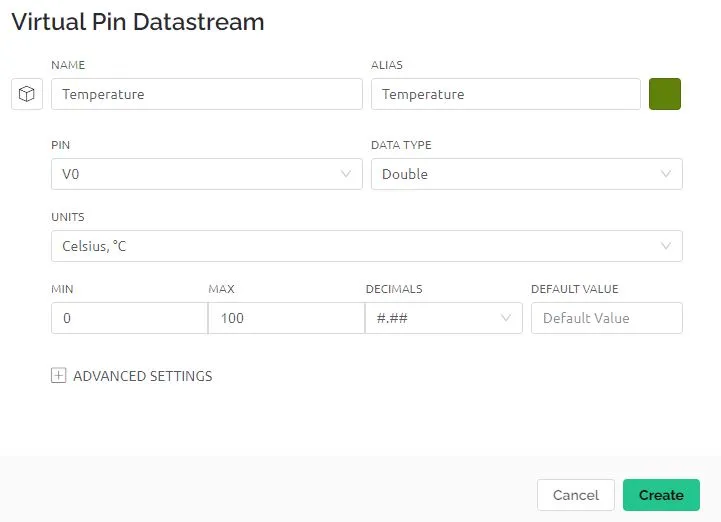
Fill in the Virtual Pin Details as shown below for Temperature and click on Create. Similarly create for Pressure and Altitude.
Once Datastreams are created you can see them listed below as shown and click on Save.

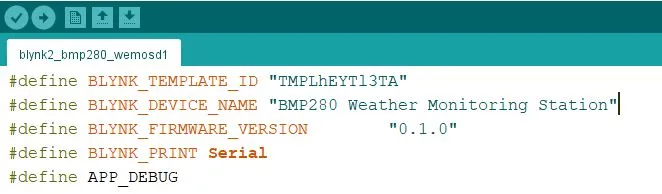
Now lets update the code and upload it in WeMos D1 Mini. Copy the lines shown after creating the template.
Paste it in the code as shown below and upload the code.
Activating or Connecting Hardware with Blynk
Now we will activate the device or hardware using new Blynk app using below steps.
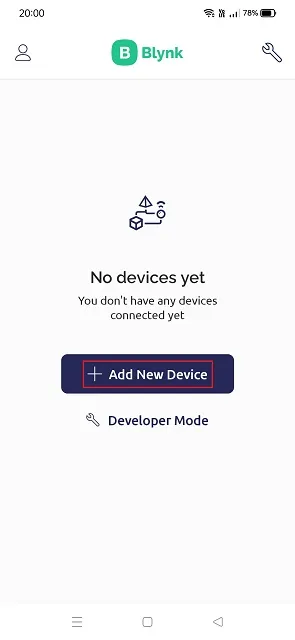
Login in Blynk app and tap on Add New Device
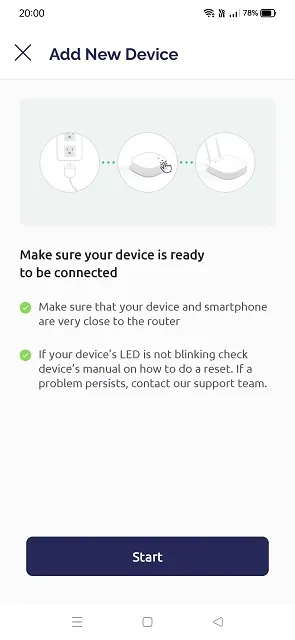
Tap on Connect to Wi-Fi

Tap on Start
Goto Wi-Fi Settings on of smartphone and you will find a Blynk based access point with template name.
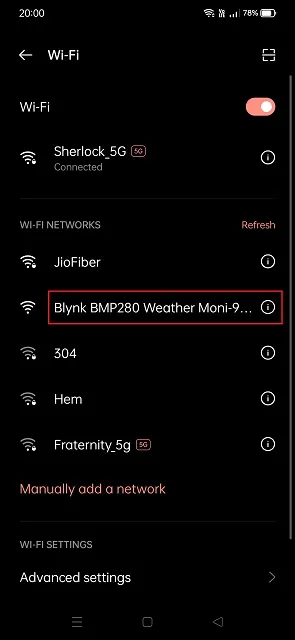
Tap on it and connect
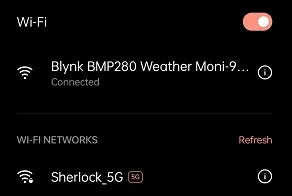
Now Blynk app with connect your device with Blynk cloud. It will ask for your wifi details.

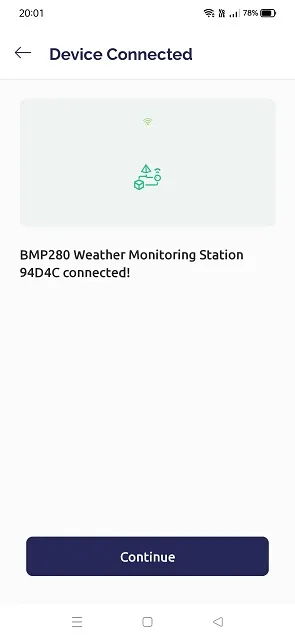
It will get connected and give you an option to Continue
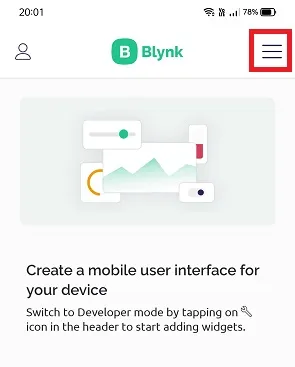
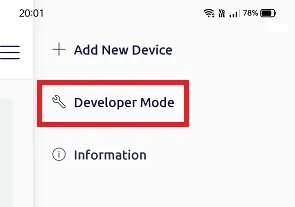
Now tap on menu and then tap on Developer Mode
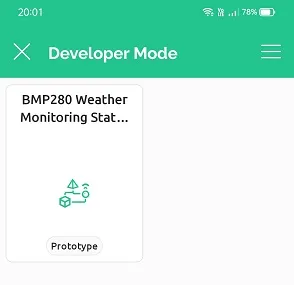
You will see the template is shown here. Tap on it
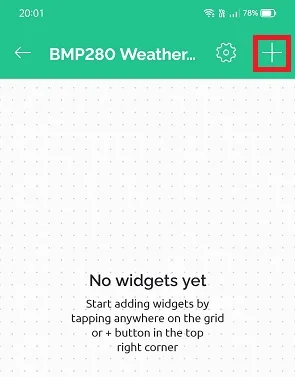
Tap on the + Icon to add the widgets
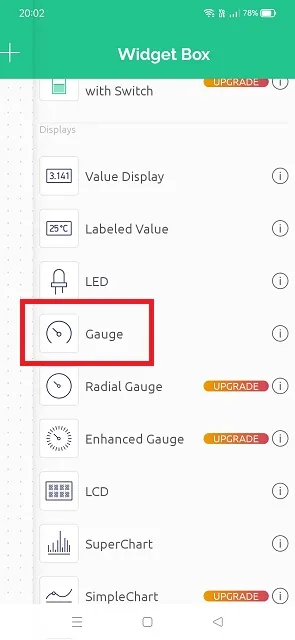
Scroll down and select the Gauge widgets
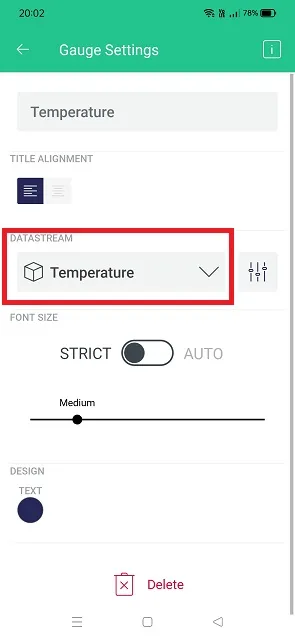
Configure the gauge by selecting the proper Datastream
Code
You can download the entire code from below link and open it using Arduino IDE.

Building & Testing
Once the connection is done as per the connection diagram and all the above steps are completed, then its time to test the project.
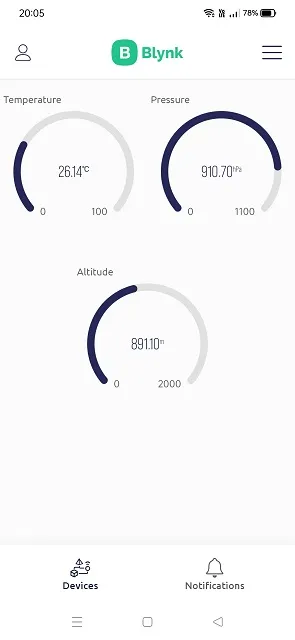
You will get the below real-time output in blynk app.
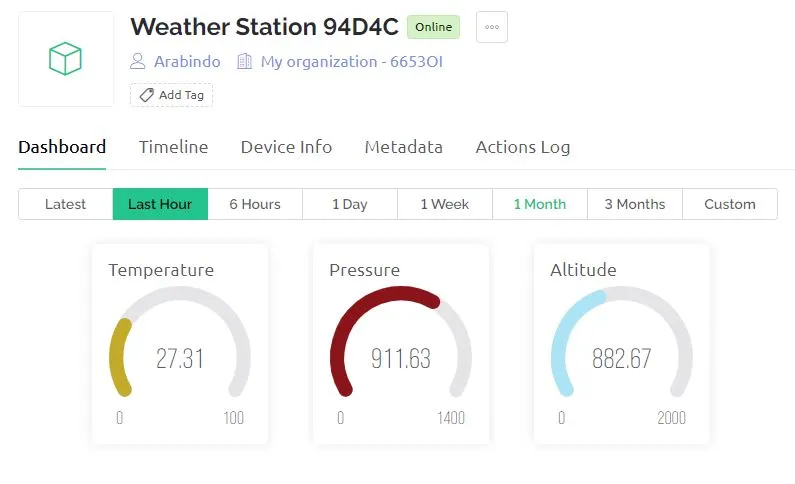
Similarly if you configure the web dashboard then you will be getting the same output there as well as shown below.
Summary
Monitoring weather data can be a fun and informative process. By using a sensor like the BMP280 and integrating it with Blynk 2.0, you can easily collect weather data from a variety of locations. This data can then be used to monitor weather conditions, forecast weather patterns.
You can use the BMP280 to collect data by building a small weather station. The Blynk app is used to collect data from a variety of sensors, and display it in app or web dashboards. Hope you like this tutorial and don’t forget to share this tutorial.
Some more Interesting Projects:
- Web Server Pulse Oximeter using NodeMCU ESP8266
- Getting Started with Arduino IoT cloud using NodeMCU and DHT11
- Weather Station with Raspberry Pi PICO and DHT11
- Controlling a servo motor using Raspberry Pi Pico
- Configuring BMP280 Sensor with Raspberry Pi
- Weather Station with BMP280 Sensor and Raspberry Pi Pico
- IoT Pulse Oximeter Using NodeMCU MAX30100 & Blynk
- DIY Digital clock with RTC DS1307 and Raspberry Pi PICO
- IoT Security Camera using ESP32-Cam Blynk and PIR Sensor
- ESP8266 based IoT Panic Alarm for Old Age People using Blynk
- How to send sensor data to Thingspeak using Raspberry Pi
- ESP32-CAM based Email Notification System
- ESP32 based Gas Leakage Detection using Email Notification
- IoT based Motion Detection Alarm using ESP8266 and Blynk
- IoT based Fire Security Alarm System using NodeMCU
- NTP Digital Clock using ESP8266 and OLED Display
- DHT11 Sensor with ESP-NOW and ESP32
- DHT11 based Temperature Humidity Monitoring IoT Project