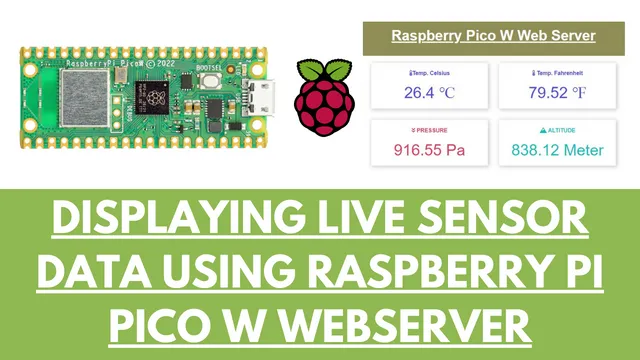
Raspberry Pi Pico W web server with BMP180 sensor
In this tutorial we will learn to connect a temperature and pressure sensor with Raspberry pi pico W. There are many temperature sensors available in the market. Here we will use BMP180 sensor to collect the temperature, pressure and altitude data. These sensor data will be collected and send to a webserver which will display the data. So lets start building Raspberry Pi Pico W web server with BMP180 sensor.
Part Required
- Raspberry Pi Pico W
- BMP180 Sensor
- Jumper Cables
- Breadboard
BMP180 Sensor

BMP180 Sensor is an extremely precise low cost sensor for measuring barometric pressure and temperature. Since pressure changes with altitude, hence you can also use it as an altimeter. The sensor is soldered onto a PCB with a 3.3V regulator. It also contains I2C level shifter and pull-up resistors on the I2C pins. It is very similar to BMP085 sensor module in terms of libraries.
Features:-
- Input Voltage Vin: 3 to 5V DC
- Logic: 3 to 5V compliant
- Pressure sensing range: 300-1100 hPa (500m to -9000m above sea level)
- Resolution up to 0.03hPa / 0.25m
- operational range -40 to +85°C
- Temperature accuracy +-2°C
- This board/chip uses I2C 7-bit address 0x77
Working
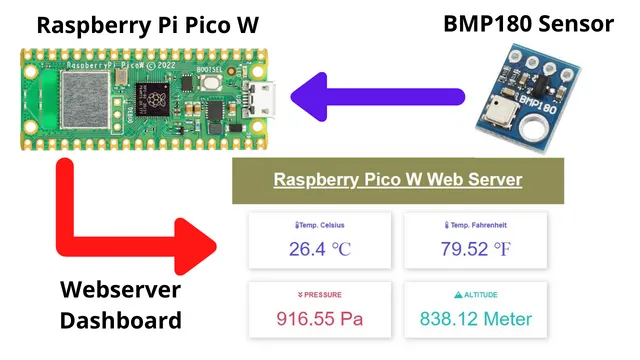
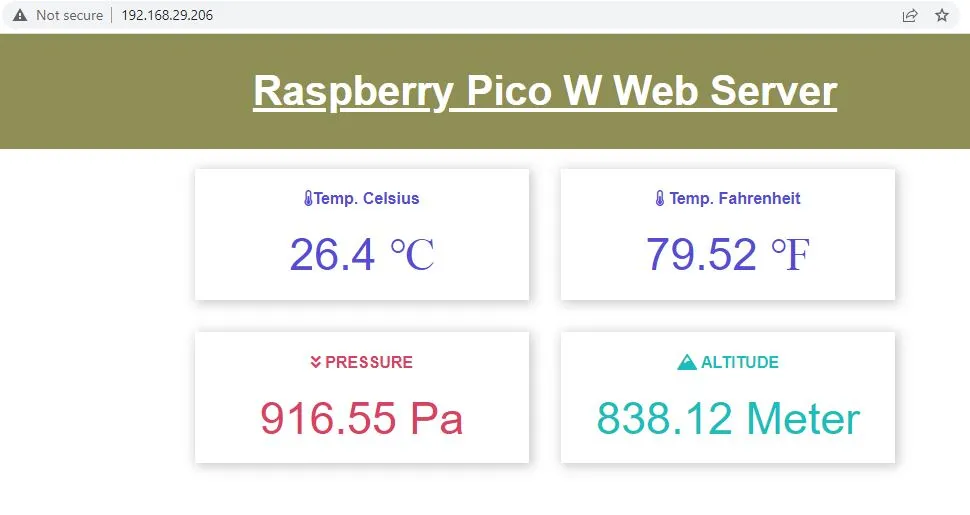
The BMP180 sensor will measure the temperature and pressure, which will further send to Raspberry Pi Pico W. In pico W will act as a webserver with a webpage. It will display the live sensor data in a dashboard followed by a IP address.
Connection
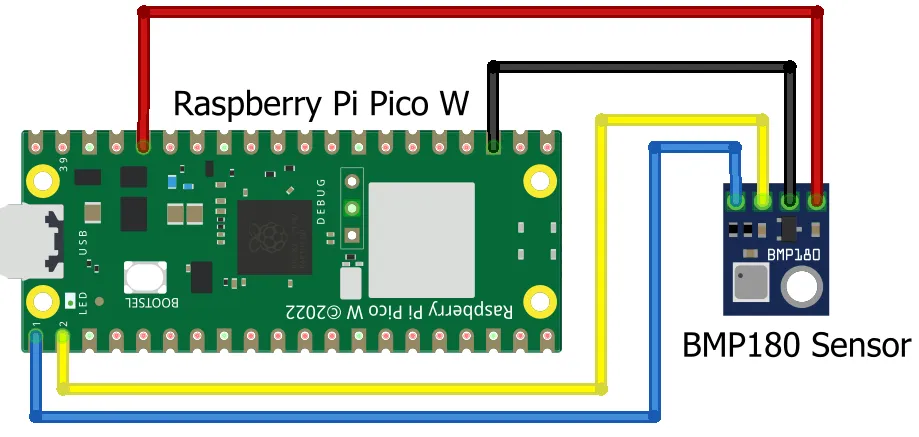
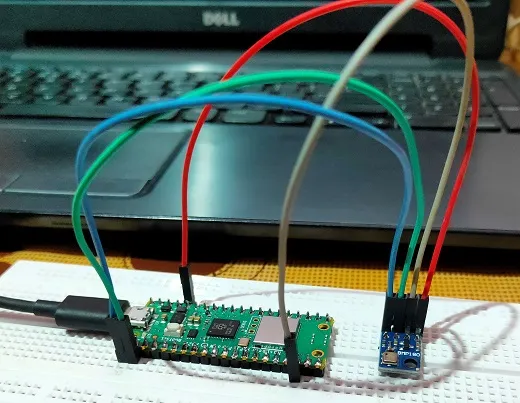
Now Raspberry Pi Pico W is connected with BMP180 sensor as per the diagram below. The VCC and GND pin of BMP180 sensor is connected with pin 36 and pin 23 of pi pico w respectively. Now the SDA and SLC pins of sensor is connected with pin 1 and 2 of pi pico w. The connection can be done on a breadboard with a help of few jumper cables.
Code
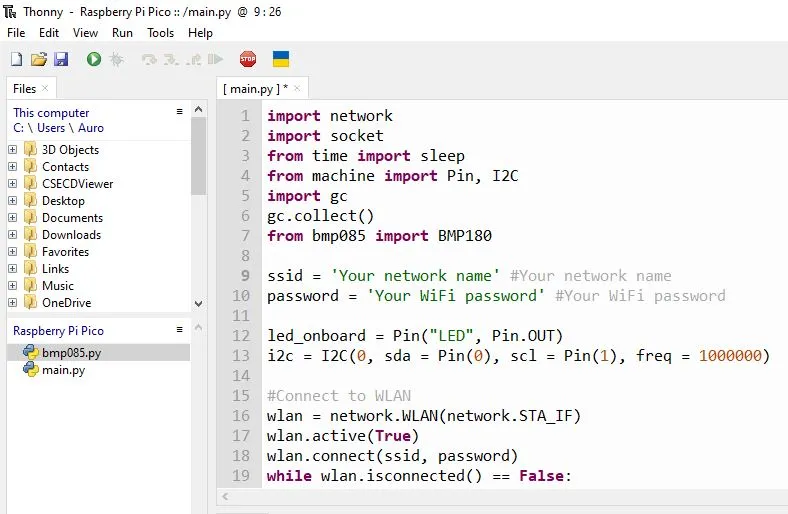
Download the code from the given link below. Unzip the code after downloading it and open it using Thonny Python editor. There will be 2 python files in the folder. Upload them both in Raspberry Pi Pico W. if you are not sure how to upload code using Thonny then refer to below article.
Getting started with Raspberry Pi PICO and Thonny IDE

After opening the code in Thonny IDE don’t forget to add the wifi network details and save it in raspberry pi pico W. The python file named bmp180.py contains the library for the sensor and the main.py contains the actual code.
Building & Testing
We have connected the pico and BMP180 sensor in a breadboard as shown in connection diagram. Now we have uploaded the code and powered the pi pico w.
In Thonny IDE you will see the IP address is displayed. This IP address will hold the webpage which will show the live sensor data.
More Interesting Projects:
- Controlling Devices with Raspberry Pi using Python
- IoT LPG Gas Detection with Blynk 2.0
- Building Node-RED Dashboard with DHT11 Sensor
- IoT Smart Plant Watering System Project
- Monitoring Weather Data using BMP280 and Blynk 2.0
- Web Server Pulse Oximeter using NodeMCU ESP8266
- Getting Started with Arduino IoT cloud using NodeMCU and DHT11
- Weather Station with Raspberry Pi PICO and DHT11
- Controlling a servo motor using Raspberry Pi Pico
- Configuring BMP280 Sensor with Raspberry Pi
- Weather Station with BMP280 Sensor and Raspberry Pi Pico
- IoT Pulse Oximeter Using NodeMCU MAX30100 & Blynk
- DIY Digital clock with RTC DS1307 and Raspberry Pi PICO
- How to send sensor data to Thingspeak using Raspberry Pi
- ESP32-CAM based Email Notification System
- ESP32 based Gas Leakage Detection using Email Notification
- IoT based Motion Detection Alarm using ESP8266 and Blynk