Reading built in Temperature sensor values of Raspberry Pi PICO
Raspberry Pi Pico is one of the cheapest micro python based board available in the market. This can be used in building many projects. PICO also has a inbuilt temperature sensor. In this tutorial we will be Reading built in Temperature sensor values of Raspberry Pi PICO. Lets get started building this project.
Parts List
- Raspberry Pi PICO x 1
- 16×2 LCD Display x 1
- Micro USB data cable
- Breadboard x 1
- Jumper cables
Working
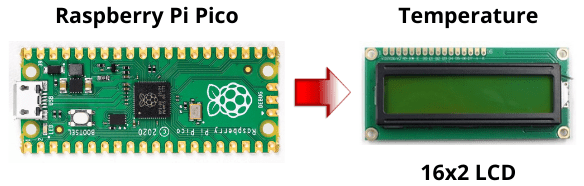
Raspberry Pi Pico supports micro python and embedded C. In this tutorial we are going to use micro python code to get the temperature reading from the sensor. Here the working is simple in terms of connection. Pico board has a inbuilt temperature sensor which will capture the reading and display them in a LCD display.
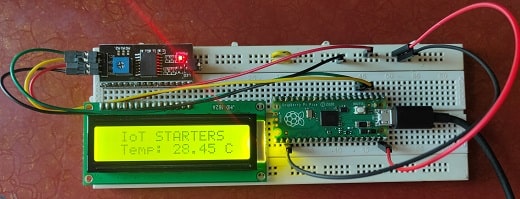
Connection
For connecting the LCD with Raspberry Pi Pico we will be using I2C protocol. This helps us to use less GPIO pins in Pico board. The SDA pin of LCD is connected to GPIO3 and SCL is connected GPIO2 of Pico. We also need a data cable to connect PICO with computer or laptop.

Code Analysis
Before we upload and execute this code, we need to understand the different lines of code.
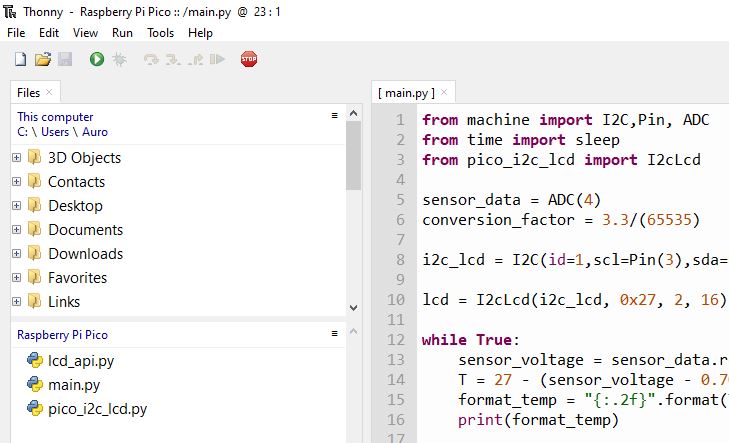
Below line of code are used for importing the libraries.
from machine import I2C,Pin, ADC
from time import sleep
from pico_i2c_lcd import I2cLcd
Now we are configuring i2c pin connection as connected with Pico board. you may change it if you want.
i2c_lcd = I2C(id=1,scl=Pin(3),sda=Pin(2),freq=100000)
lcd = I2cLcd(i2c_lcd, 0x27, 2, 16)
Here we are measuring the value of sensor voltage and calculating the temperature. Also we are formatting the output to 2 decimal values and finally printing it in the serial console.
T = 27 - (sensor_voltage - 0.706)/0.001721
format_temp = "{:.2f}".format(T)
print(format_temp)
After getting the results we are displaying it in LCD with a delay of 0.5 seconds.
lcd.move_to(2,0) // position and line
lcd.putstr('IoT STARTERS')
lcd.move_to(2,1) //position and line
lcd.putstr('Temp: ' + str (format_temp) + ' C')
sleep(0.5)
Code
You can download the code from the link below. Unzip and open the code using Thonny editor. You can download Thonny micro python editor and open the files. For setting and uploading the code in Raspberry Pi Pico using Thonny you refer the below article.
Raspberry Pi PICO with Thonny IDE

There are 3 files in the zip folder. Two files are supporting libraries and main.py contains the actual python code. You need to upload the libraries without changing anything. For LCD interfacing we are using lcd_api.py and pico_i2c_lcd.py as Pico i2c library for LCD interfacing. Once you have uploaded the codes, now press the green play button to run the code.
Suggested Reading:
- ESP8266 based IoT Panic Alarm for Old Age People using Blynk
- Pico Cheapest MicroPython Board
- Raspberry Pi PICO with Thonny IDE
- How to send sensor data to Thingspeak using Raspberry Pi
- ESP32-CAM based Email Notification System
- Raspberry Pi Pico vs Arduino Which one to choose?
- ESP32 based Gas Leakage Detection using Email Notification
- IoT based Motion Detection Alarm using ESP8266 and Blynk
- IoT based Fire Security Alarm System using NodeMCU
- NTP Digital Clock using ESP8266 and OLED Display
- IoT Vehicle Parking System using ESP8266 and Blynk
- Smart Switch using Blynk | IoT Based WiFi Switch
- How to install Raspbian Lite on Raspberry Pi Zero W
- Connecting DHT11 Sensor with Raspberry Pi 4 / 3 using Python
- DHT11 Data Logger using Raspberry Pi and Python code
Building & Testing
Now we have setup our project and uploaded the code, its time to test it. Once the code executes the temperature is displayed in the LCD.
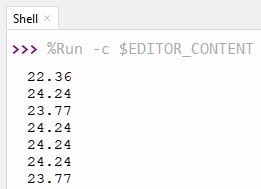
Along with LCD you can see the temperature values displayed in the Thonny shell editor as shown below. If you are able to get the output, which indicates the project is build and tested.
Summary
We are using Raspberry Pi Pico’s inbuilt temperature sensor to get the temperature values. Also we are using a 16×2 LCD to display these values. We are using micro python code and library to achieve this. This project is easy for beginners. You can make this as your first micro python project using Pico board. Please try this out and comment below. Please share this article to motivate us.