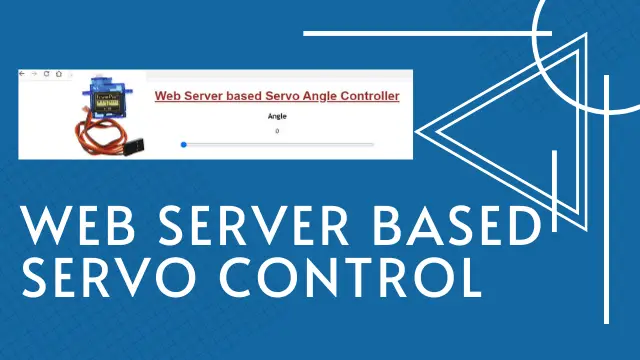
Wemos D1 Mini Web Server based Servo Motor Control
So far, we have generated the pwm signal in various ways and thus controlled the servo motors. In this tutorial, we are going to do this differently. We will be using a web server run by our Wemos board and we will be able to measure the pwm. Also it will control the amount of rotation of the desired servo motor. In short we will learn about Wemos D1 Mini Web Server based Servo Motor Control.
Materials Required
SG90 Servo Motor
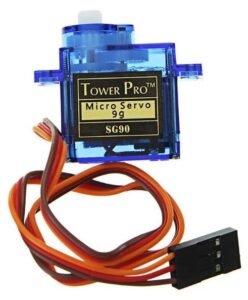
A servo motor is a type of motor that can rotate very accurately. This type of motor consists of a control circuit that provides feedback on the current position of the motor shaft. This feature allows servo motors to rotate with great precision. Servo motors are classified into different types based on their application, such as AC servo motors and DC servo motors.
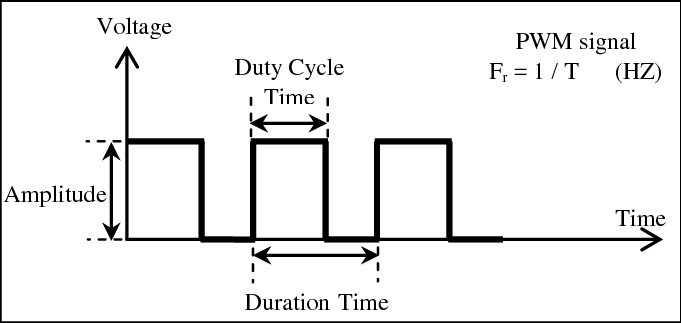
Square wave or PWM
Pulse Width Modulation or pwm, a way to regulate electrical power by changing the cut-off time and the connection of the source in each cycle. In fact, pwm is a square signal that can be 1 or 5 volts at a time, or 0, which means 0 volts. For example, if the Duty Cycle of a PWM wave is equal to 80%, that is, in each cycle 80% of the voltage is equal to 5 volts and 20% of the voltage is equal to 0. The PWM is shown in the figure below.
How this project works?
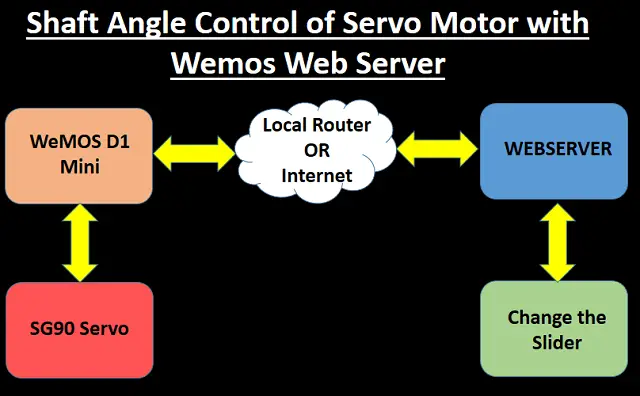
In this project, we first run a web server on port 80 using the Wemos D1 mini board, which uses the ESP8266 chip. We can also customize the page as needed, where we have a slider to change the pwm values. By changing the slider values from 0 to 180 we will be able to control the servo motor connected to Wemos D1 Mini.
Connection Diagram
In this project, we will use one of the pwm pins of ESP8266 board to start the SG90 servo motor. In this case, we will use pin D4, but you can change this part according to your interest and needs by changing a part of the code. Make the connections according to the schematic and the table below.
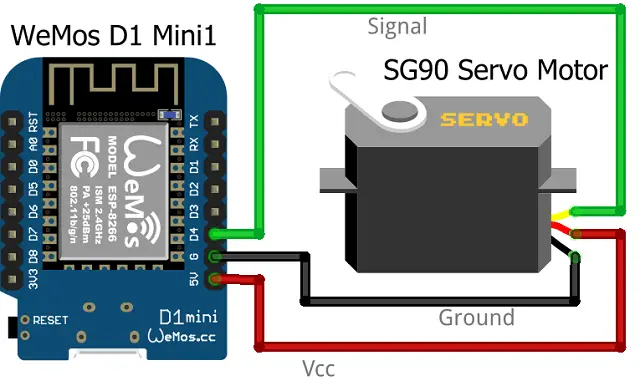
It should be noted that all IO pins in Wemos except D0 and A0 support pwm, so you can extend this project to a large number to control more servers.
Some More Projects:
- ESP8266 Web Server for Controlling Electrical Devices
- Controlling ESP32 via Bluetooth using Blynk
- Interfacing Ultrasonic Sensor HC SR04 with Arduino Uno
- Interfacing MQ2 Gas Sensor with Arduino
- IoT based Timer Switch using Blynk and NodeMCU
- Raspberry Pi Temperature Logger DS18B20
- ESP32 based Switch Notification Project using Blynk
Code Analysis
We need to upload the code to start the project, but first we will look at the important parts and sections that need to be explained. We will first call the required libraries. In this project we will use only servo and ESP8266WiFi libraries.
#include <ESP8266WiFi.h>
#include <Servo.h>
In this line, we specify the PIN for connecting the signal wire of the SG90 servo motor with Wemos D1 Mini.
static const int ServoGPIO = D4;
In the following, we introduce the Wi-Fi network information intended for connecting the board.
const char* ssid = "Your WiFi SSID";
const char* password = "Your WiFi Password";
This part of the code is made for the appearance and functions of the web page, which you can change if necessary and customize it to your liking.
client.println(“<!DOCTYPE html><html>”);
client.println(“<head><meta name=\”viewport\” content=\”width=device-width, initial-scale=1\”>”);
client.println(“<title>Servo Angle Controller</title>”);
client.println(“<link rel=\”icon\” href=\”data:,\”>”);
client.println(“<style>body { text-align: center; font-family: \”Trebuchet MS\”, Arial; margin-left:auto; margin-right:auto;}”);
client.println(“.headertext{ font-weight:bold; font-family:Arial ; text-align: center; color: brown ;}”);
client.println(“.slider { width: 500px; }</style>”);
client.println(“<script src=\”https://ajax.googleapis.com/ajax/libs/jquery/3.3.1/jquery.min.js\”></script>”);
client.println(“</head><body><h1><u><div class = \”headertext\”> Web Server based Servo Angle Controller</u></h1>”);
client.println(“<p><h3>Angle</h3><span id=\”servoPos\”></span></p>”);
client.println(“<input type=\”range\” min=\”0\” max=\”180\” class=\”slider\” id=\”servoSlider\” onchange=\”servo(this.value)\” value=\””+valueString+”\”/>”);
client.println(“<script>var slider = document.getElementById(\”servoSlider\”);”);
client.println(“var servoP = document.getElementById(\”servoPos\”); servoP.innerHTML = slider.value;”);
client.println(“slider.oninput = function() { slider.value = this.value; servoP.innerHTML = this.value; }”);
client.println(“$.ajaxSetup({timeout:1000}); function servo(pos) { “);
client.println(“$.get(\”/?value=\” + pos + \”&\”); {Connection: close};}</script>”);
client.println(“</body></html>”);
Final Code & Uploading the Code
You can download the code from the link below. Unzip it and open it using Arduino IDE. Compile the code and upload the code to Wemos D1 mini board.
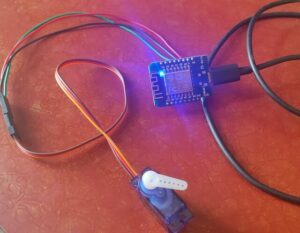
 Construction & Testing
Once you complete the hardware connections and upload the code, Now its time to get the ip address of your webserver.
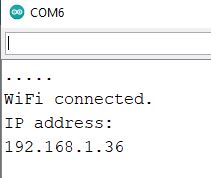
Open the Arduino IDE serial monitor and reset the WeMOS D1 Mini. Here it will show you the IP address of your web server.
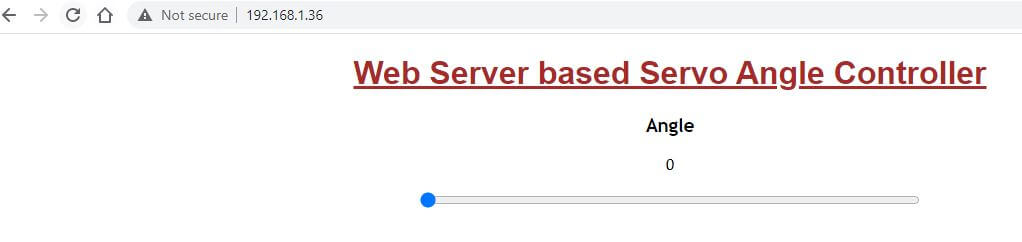
Now enter this IP address in browser and press enter. You will get the GUI interface of your webserver as shown below. If you move the slider then you will see a corresponding movement in servo motor.
Conclusion
In this project, by building a web server using the Wemos board that uses the ESP8266 chip. We were able to run a web page in which we used a slider to measure the pwm values on the ESP8266 board that is connected to the D4 pin. Change the slider so that the servo motor shaft changes from 0 to 180 degrees as per your requirement. Of course, by changing the code and adding elements, you will be able to control more SG90 servo motors together.
Hiya,
Thank you for the nice tutorial. Fantastic code, however i need some help
to add a button control for the servo to Move Forward and Back. Also a fix button to get
the servo to move at a specific pos – eg Move 45 , Move 90 like that.
Thank you again.
Cheers.
Shams