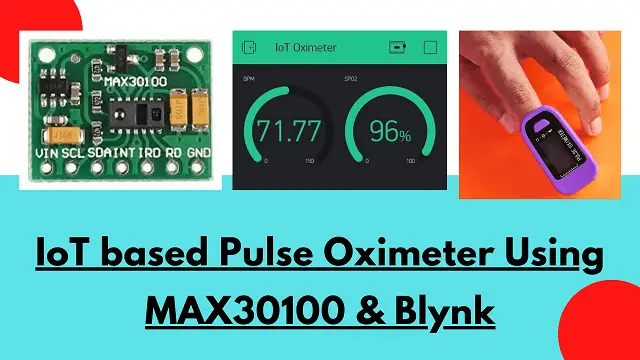
IoT Pulse Oximeter Using NodeMCU MAX30100 & Blynk
These days pulse oximeter is an important and life saving medical equipment. Due to COVID it is advisable to keep it at home as well. In this article we will build a IoT Pulse Oximeter Using NodeMCU MAX30100 & Blynk app. Building this by your own will help us to know the how pulse oximeter works and what are the components required to build it. Here we will build it contact less with the help of IoT technology. Let’s see how to build it.
Things Required
For building this project you need below components
- NodeMCU x 1
- MAX 30100 Module x 1
- Jumper Cables
MAX30100 Pulse Sensor Module
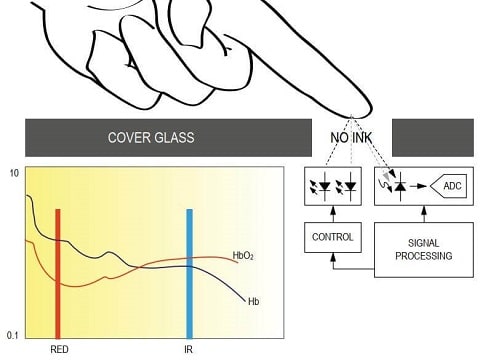
Since the manufacturer of this sensor is Maxim hence it is name as MAX30100. It is a integrated pulse oximetry and a heart-rate sensor. It’s an optical sensor based module which collects the readings by emitting two wavelengths of light from two LED’s. The two LED’s are normal red and an infrared one.
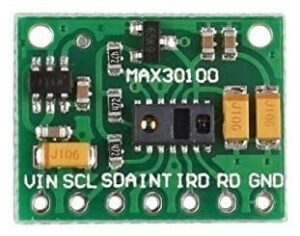
The measurement is done by the absorbance of pulsing blood, which is further detected by a photodetector. This light arrangement is optimized for reading the data through the finger tip.
This signal is further processed by a low-noise analog signal processing unit. After processing it is sent to the micro controller unit through I2C interface. The module operates at 3.3V power supply, which makes it flexible to connect with NodeMCU.
Main Applications:
- Medical Monitoring Devices
- Fitness Assistant Devices
- Wearable Devices
Specifications and Features
- IR and red LED combined with a photodetector
- I2C interface available
- Requires 3.3V power supply
- Simple design, integrated LEDs, photo sensor
- Ultra low power operation increases battery life for wearable devices
- Advanced functionality improves measurement performance
- High SNR provides robust motion free data collection
- Ambient light and light cancellation
- High sample rate capability fast data output capability
- It is an integrated pulse oximeter and heart rate monitor sensor
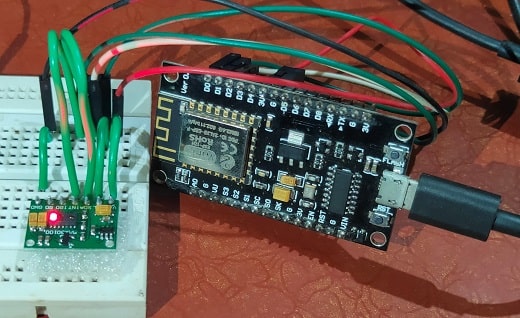
Connection
The connection is simple and easy to connect on a breadboard using some jumper cables. Below table shows the pin to pin connection between NodeMCU and MAX30100 module.
NodeMCU | MAX30100 Module |
3.3V | Vin |
GND | GND |
D0 | INT |
D1 | SCL |
D2 | SDA |

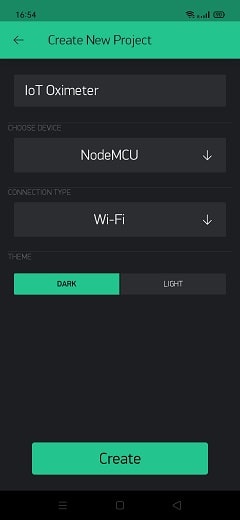
Setting Up Blynk Project
We need to setup a project in Blynk App. You can download the Blynk app from below links
After you download the app, install and open it. Tap on Create New Project and Update the fields as shown below
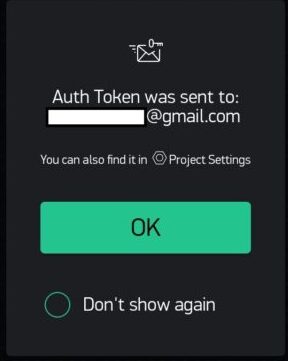
An email containing the Blynk Auth Token will be sent to your registered email id.
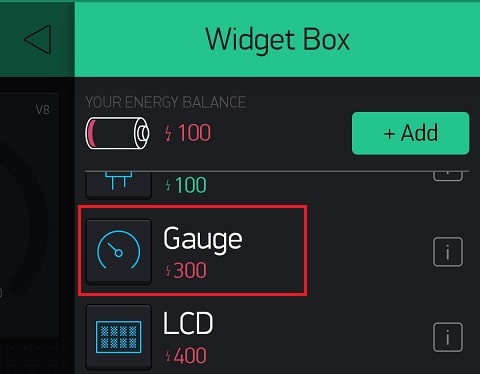
Now we will add widgets from Widget Box. Select 2 Gauge widget as we are going to display the data using Gauge.
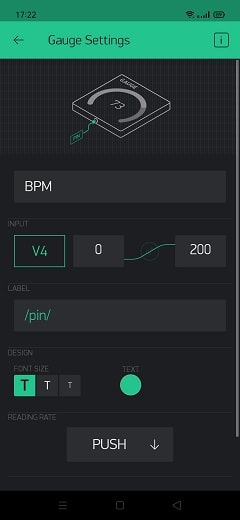
Configure first gauge which will display the BPM value
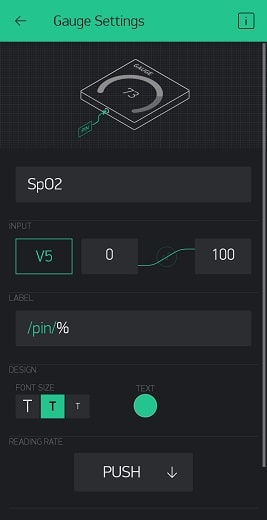
Other gauge will display SpO2 and configure it as per below settings.
Code Update
Before we upload the code we need to update certain data. First we need to update the Auth Token.
char auth[] = "Auth Token"; //Blynk Authentication Token
Then we need to update network details to connect the NodeMCU with your WiFi connectivity.
char ssid[] = "xxxxxxxxxxxxxxx"; //Your WiFi SSID
char pass[] = "xxxxxxxxxxxx"; //Your WiFi Password
Final Code
You can download the code from below download link and open it using Arduino IDE. Unzip the folder and compile the code. Make sure you have updated the details as shown above. If you ar facing issues while uploading the code then you can refer the guide below.
Easy NodeMCU Programming with Simple Steps

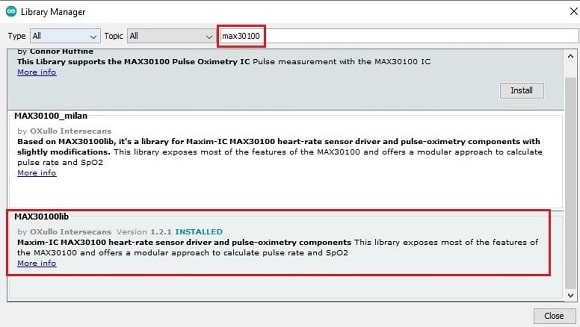
Make sure you have installed ESP8266 library along with MAX30100 library as shown below.
Building & Testing
Finally after connecting the modules as per connection diagram and uploading the code, our project is ready for testing. Once you power up the hardware it will start connecting with your wifi network.
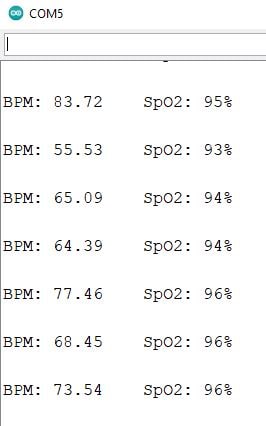
Open the Arduino Serial monitor and place the finger tip on top of pulse sensor. And you will se the below reading displayed.
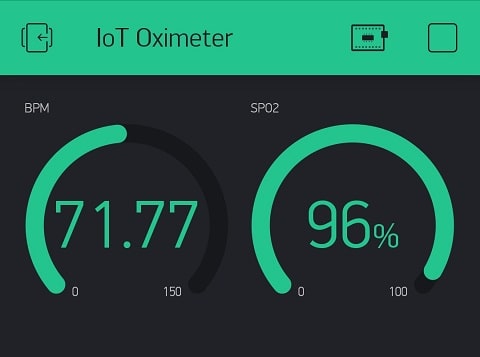
Same way if all the connection is good then on blynk app you can see the BPM and SpO2 values respectively.
More Interesting Projects:
- IoT Heart Rate Monitoring with ThingSpeak Platform
- DIY Digital clock with RTC DS1307 and Raspberry Pi PICO
- IoT Security Camera using ESP32-Cam Blynk and PIR Sensor
- Reading built in Temperature sensor values of Raspberry Pi PICO
- ESP8266 based IoT Panic Alarm for Old Age People using Blynk
- How to send sensor data to Thingspeak using Raspberry Pi
- ESP32-CAM based Email Notification System
- ESP32 based Gas Leakage Detection using Email Notification
- IoT based Fire Security Alarm System using NodeMCU
- Temperature Monitoring with ESP-DASH Webserver
- IoT Vehicle Parking System using ESP8266 and Blynk
- Important Tips to Improve Security of your Raspberry Pi
- DHT11 based Temperature Humidity Monitoring IoT Project
- Smart Switch using Blynk | IoT Based WiFi Switch
- IoT Project using Local Blynk Server
- Low Cost Local Blynk Server for IoT Projects
- NodeMCU Blynk Feedback Switch with Physical Switch Status
Summary
In this article we have seen how to build a IoT based pulse oximeter using MAX30100 sensor. It will be used to monitor the data remotely using a smartphone. It is easy for beginners to build and set it up on a breadboard. Later you can also transform this project on a piece of copper board or a PCB. Do share this project with others.
Disclaimer: DONOT use this project on critical medical conditions. Neither this blog nor the author will be responsible.