IoT Smart Plant Watering System Project
In today’s world, technology has moved to extreme level where it can make human life simple and easy. With the help of Internet of Things we can automate or control lots of such devices in out day to day life. In this tutorial we are going to build a IoT Smart Plant Watering System Project. This is simple and can be easily build by a beginner. Here we are going to control the watering system for keep the indoor plant from getting dried up completely.
IoT Smart Plant Watering System is a great way to automate watering for plants. This watering system uses sensors to detect when a plant needs water and then sends a signal to a water pump to start watering the plant. This system is very easy to set up and can be controlled using a smartphone or computer. This system is perfect for small plants or plants that don’t need a lot of water.
Materials Required
- NodeMCU ESP8266 x 1
- Soil moisture sensor x 1
- DHT11 sensor x 1
- Relay Module (Single Channel) x 1
- 6V DC Submersible Pump with pipe x 1
- Jumper Cables
Working
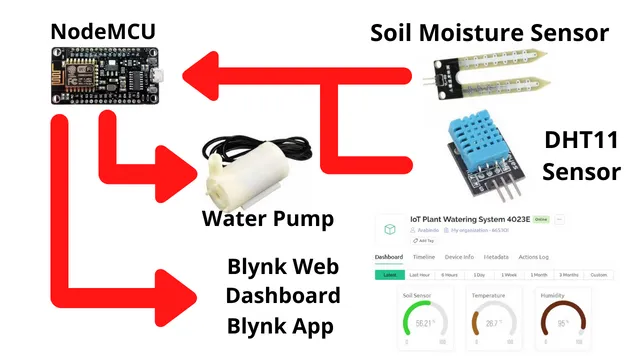
Soil moisture sensor will collect the moisture present in soil and DHT11 sensor will collect the temperature along with humidity near to the plants. Then it will send the data to ESP8266 based NodeMCU, which will send the data further to Blynk 2.0 platform. DHT11 sensor can tell you about the temperature and humidity for more precise monitoring of your plant or garden.
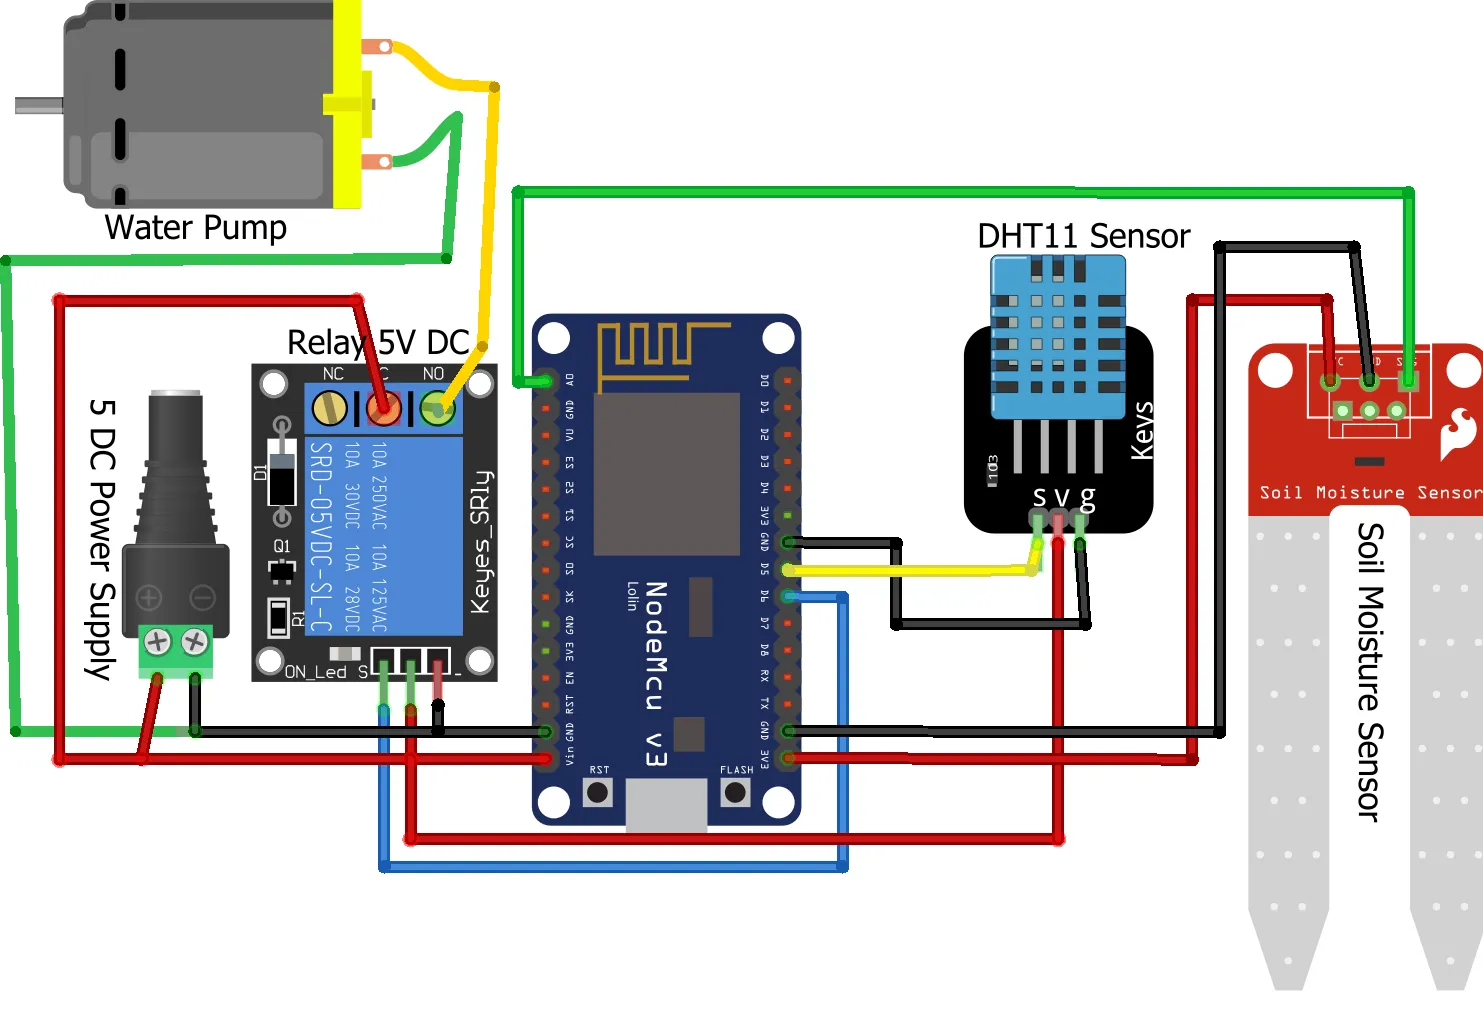
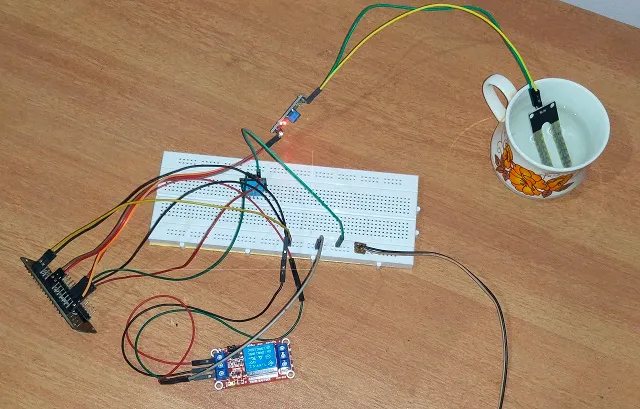
Connections
Place the modules and connect it as per the diagram shown below. It is simple to connect on a bread board or you can mount it on a pcb as well.
Configuring a project in Blynk
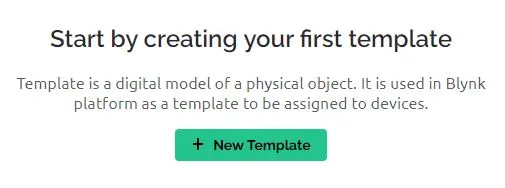
You can follow below steps to create the Blynk project in web dashboard. Click on New Template
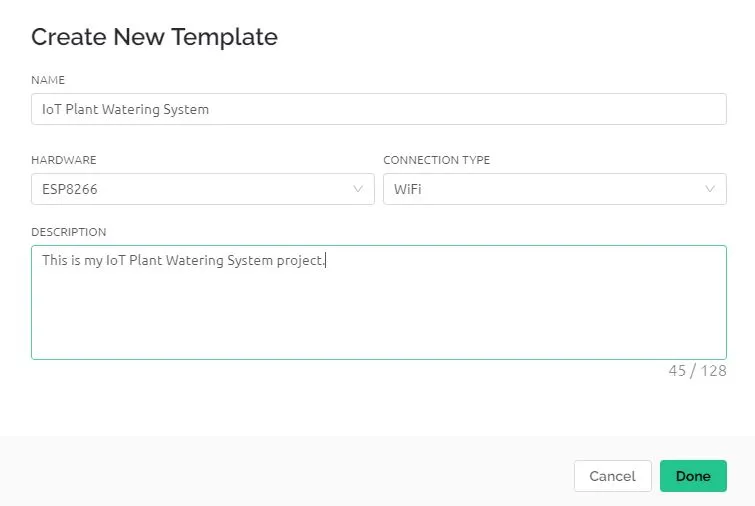
Enter the details as shown below. You can select any name of the project and provide a suitable description. Click on Done.
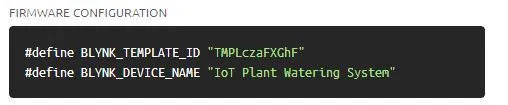
Copy the below configuration code and paste it in some notepad. Later you need to update it in first two lines of code.
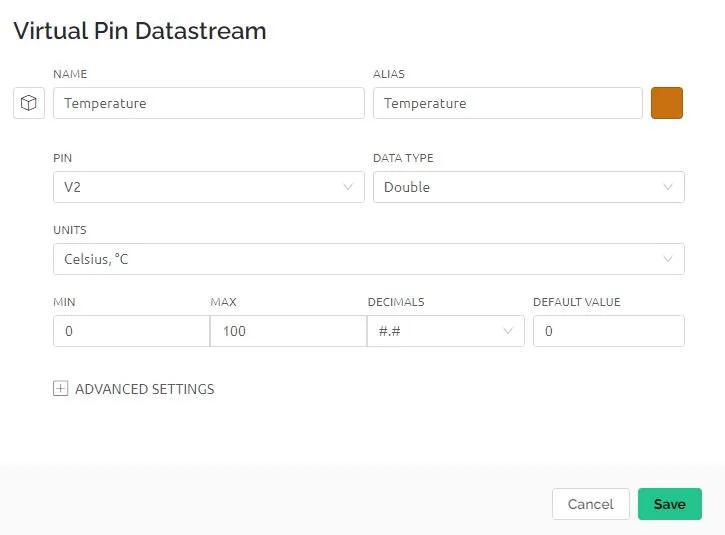
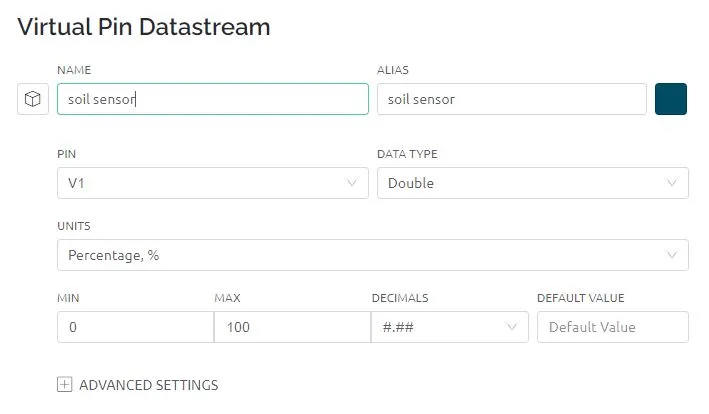
Now its time to create Datastreams, through which we are going to send the data from hardware to blynk servers.

Below Datastream is created for Temperature. We have selected V2 pin and it will be sending Double data type. Once you update it click on SAVE.
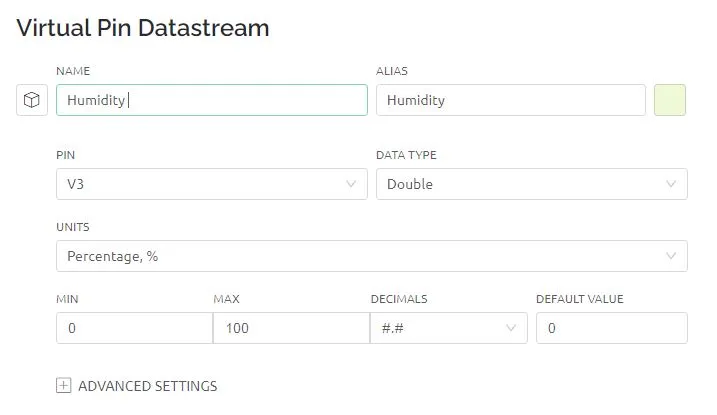
Similarly create for Humidity as well.
Same way we will create it for soil sensor as well.
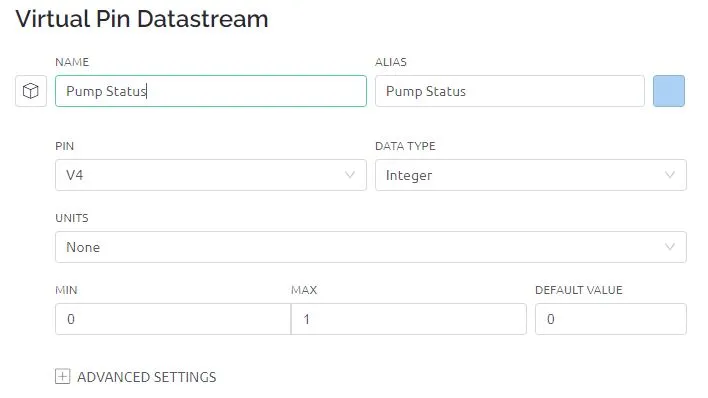
One more Datastream for knowing the pump status in our app.
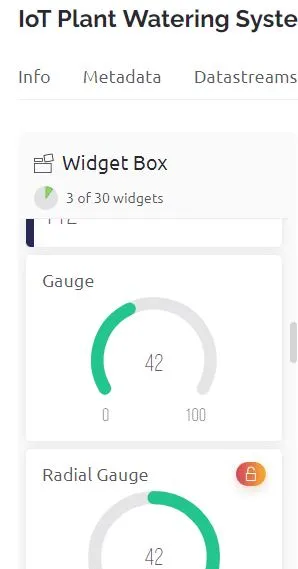
Now its time to add the widgets. Click on web dashboard and click on EDIT. Select Gauge and drag it on you right window.
Enter the gauge settings as shown below for each gauge. They will be showing Soil Moisture, temperature and humidity. Select the corresponding Datastreams for each gauge to display that data.
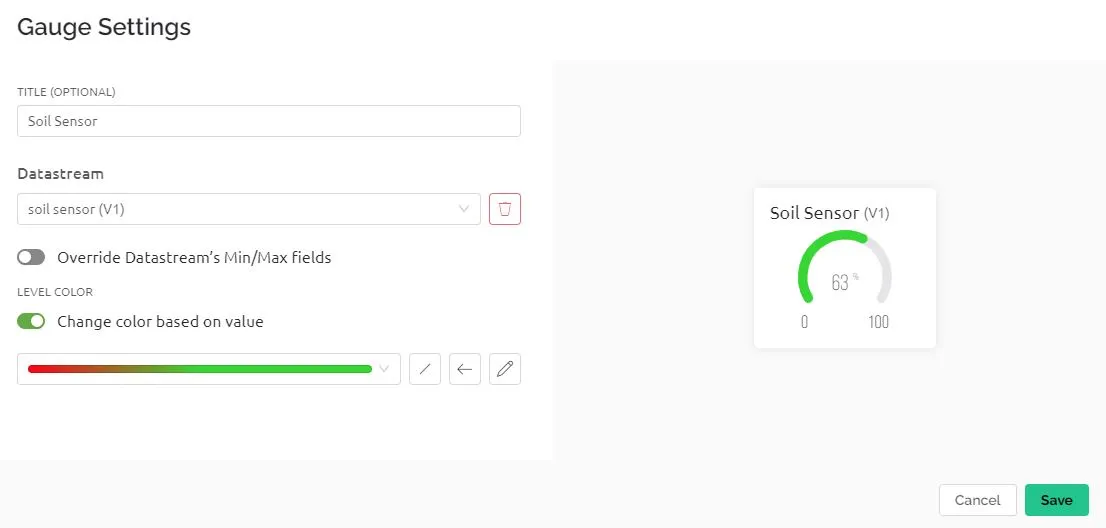
Now click on Save And Apply to make the changes on newly added Gauge widgets.

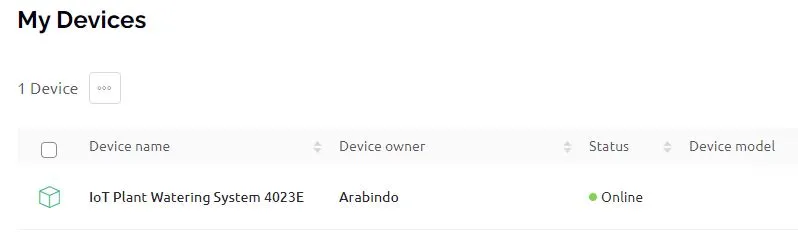
Click on the Search Icon below to go the devices.

Now you can see the device to be online and click on it further to see the web dashboard in action.
How to add a device in Blynk 2.0?
After uploading the code power your NodeMCU and follow the steps below to add the device from your blynk app. This is a one time activity.
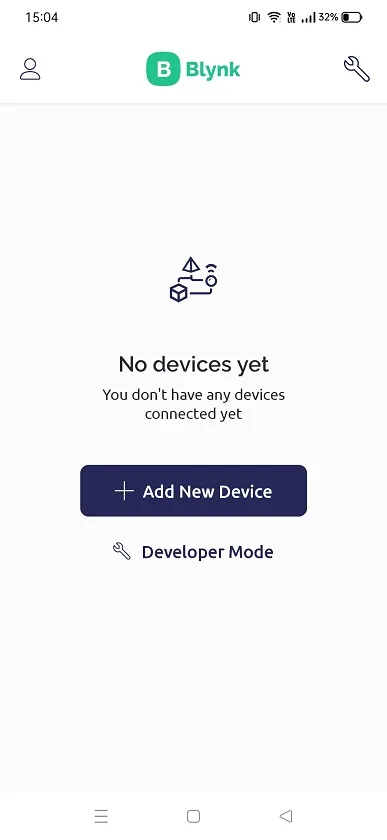
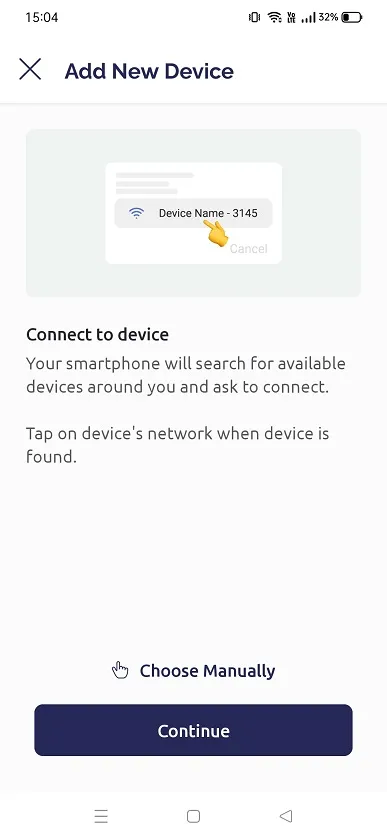
Open the new Blynk IoT app and go to developer mode. Tap on +Add New Device
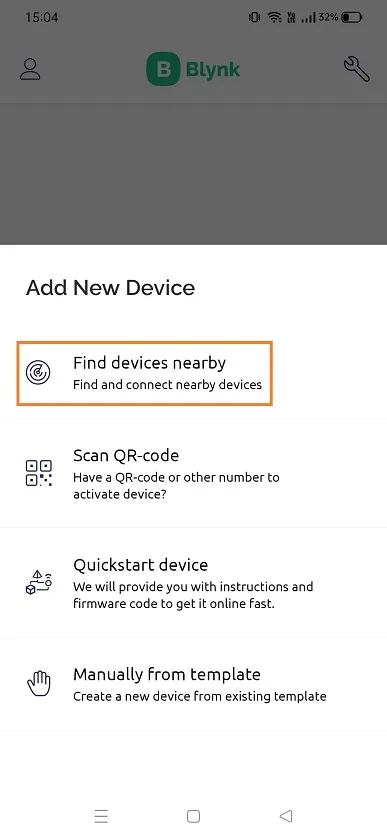
Now tap on Find Devices nearby
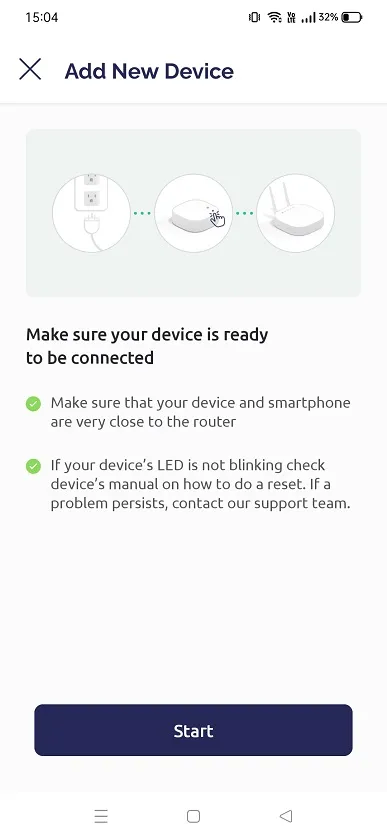
Tap on Start to add new device
Your NodeMCU will create a hotspot and you need to connect by clicking on Choose Manually
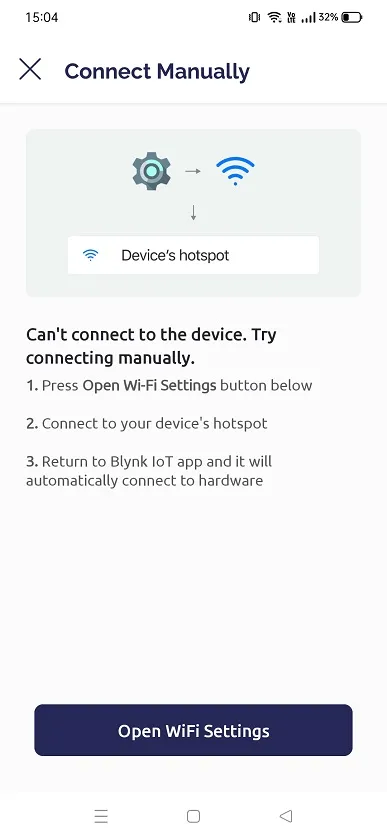
Now tap on Open WiFi Settings, which will further open your phone’s wifi settings
Now tap on the template name given by you as shown below.
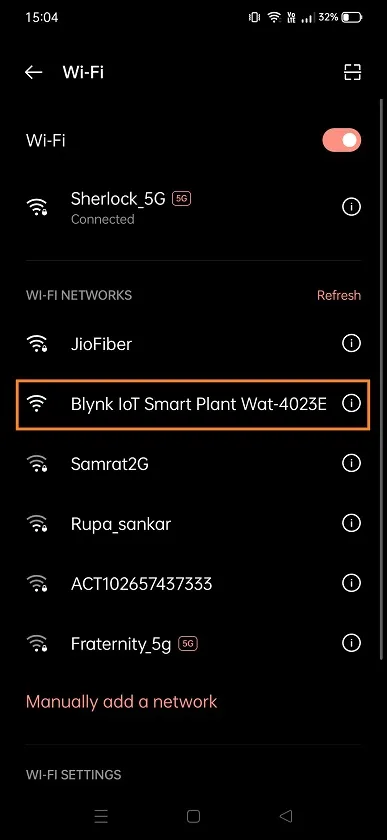
Since it is a open WiFi hotspot it will connect without asking for any credential.
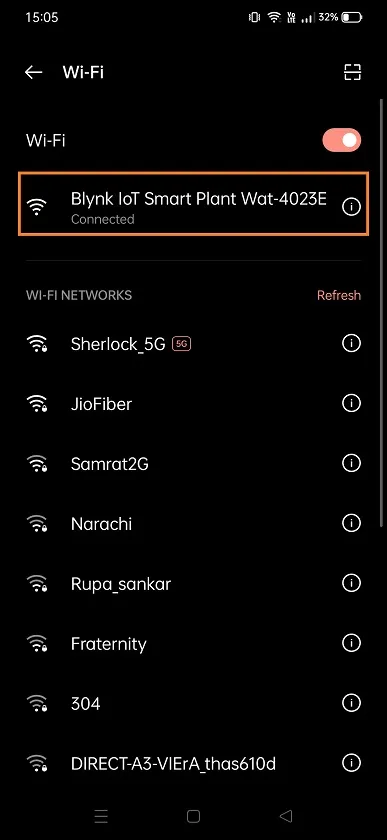
Go back and update the your network or WiFi credential details. Tap on Continue

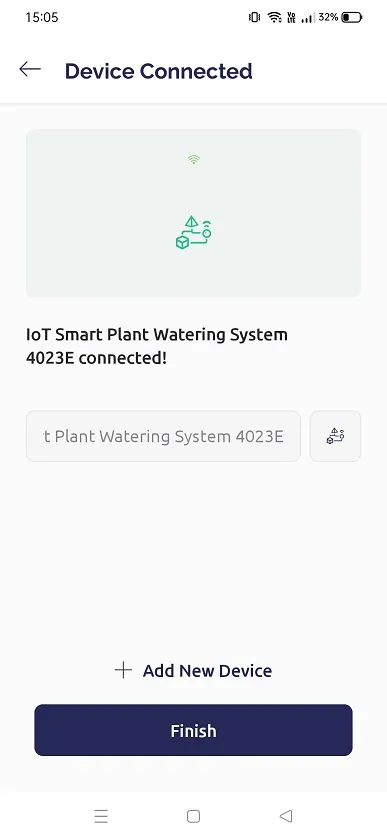
Soon it will configure you device and it will be ready to be online with Blynk.
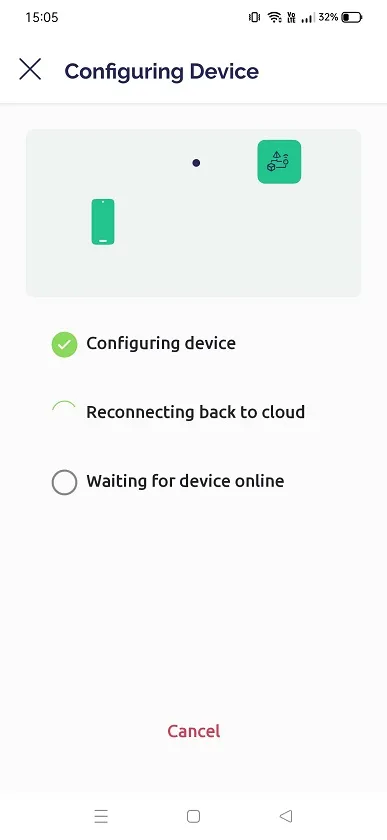
Once all the steps are done, it will show as device connected. Here device is your hardware(NodeMCU).
Final Code
You can download the code from below link and extract it in a folder. Open the code using Arduino IDE and upload it in NodeMCU.

Building and Testing
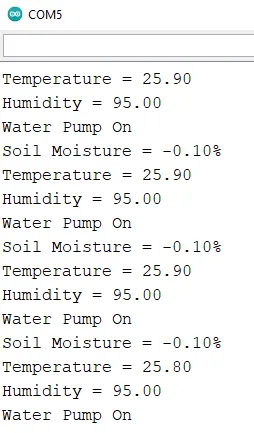
After connect the components we started the testing. We got the below results.
Once you open the serial monitor of Arduino, you can see the below readings.
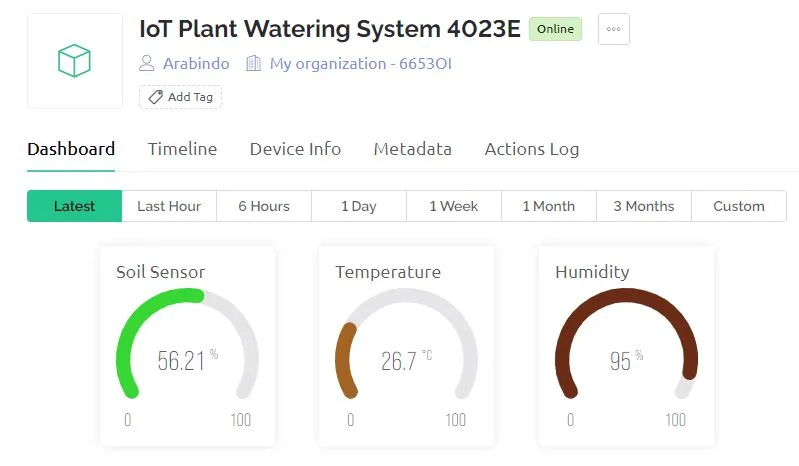
Similarly in Blynk dashboard, you will get the reading of the sensors.
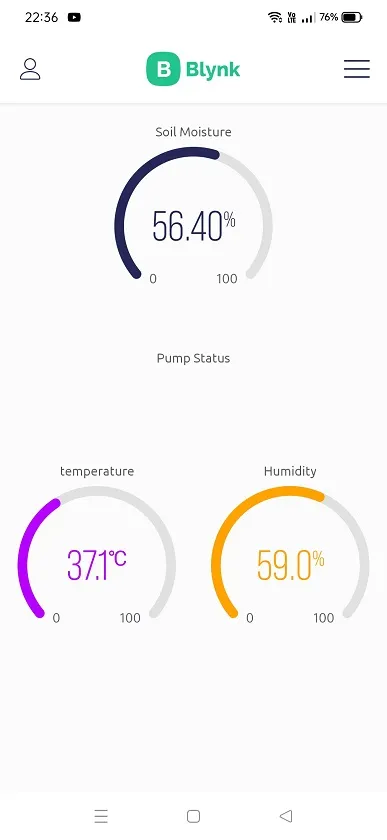
Also in mobile app you will get as shown below. The below status shown when the pump is off.
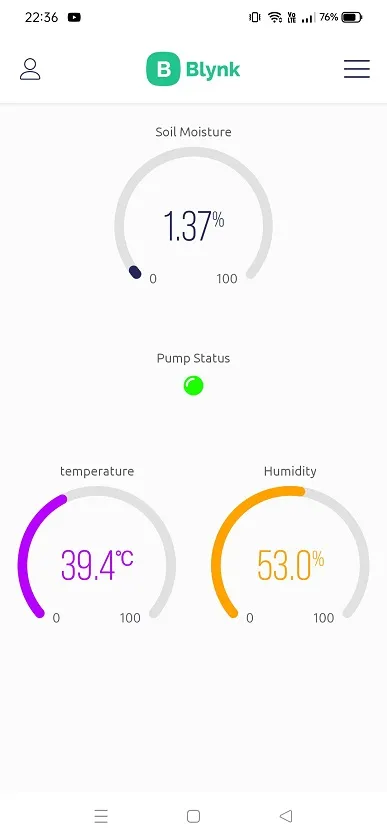
Below status shows when the pump is on.
Summary
If you’re looking for a way to automate your plant watering, an IoT smart plant watering system may be the solution for you. These systems use sensors to monitor the moisture levels in the soil, and then water the plants accordingly. This can help to reduce water waste and ensure that your plants are getting the right amount of water.
There are a number of different IoT smart plant watering systems available on the market and this is a small tutorial to build your own that best suits your needs. Consider the size of your garden, the type of plants you have, and your budget when making your decision.
Once it’s installed, you can sit back and relax knowing that your plants are being watered correctly. You may even find that you have more time to enjoy your garden, as you won’t need to check each and every time.
Some Interesting Projects:
- Monitoring Weather Data using BMP280 and Blynk 2.0
- Web Server Pulse Oximeter using NodeMCU ESP8266
- Getting Started with Arduino IoT cloud using NodeMCU and DHT11
- Weather Station with Raspberry Pi PICO and DHT11
- Controlling a servo motor using Raspberry Pi Pico
- Configuring BMP280 Sensor with Raspberry Pi
- Weather Station with BMP280 Sensor and Raspberry Pi Pico
- IoT Pulse Oximeter Using NodeMCU MAX30100 & Blynk
- DIY Digital clock with RTC DS1307 and Raspberry Pi PICO
- IoT Security Camera using ESP32-Cam Blynk and PIR Sensor
- ESP8266 based IoT Panic Alarm for Old Age People using Blynk
- How to send sensor data to Thingspeak using Raspberry Pi
- ESP32-CAM based Email Notification System
- ESP32 based Gas Leakage Detection using Email Notification
- IoT based Motion Detection Alarm using ESP8266 and Blynk
- IoT based Fire Security Alarm System using NodeMCU
- NTP Digital Clock using ESP8266 and OLED Display
- DHT11 Sensor with ESP-NOW and ESP32
- DHT11 based Temperature Humidity Monitoring IoT Project
goodle
good thank IOT
good thank IOT
Nice explanation and project. I have some queries to ask.
What changes do i need to make if i want to water 10 pots at a time? Do i have to use 10 different boards and devices? is the project for one pot only.
What changes i need to make if i want to use the network outside my home for eg use Mobile data and not wifi. My requirement is that i need to control the watering when i am outside travelling
What changes i need to make if i want to use big pipe to water my garden ( big area)
Hi Sandeep,
for watering 10 different pots the sensor has to be on all the pots. Currently this project is for 1 pot only.
This project works with mobile data as well.
For using it in your garden you have to perform some analysis e.g. what is the location of your garden, how much sunlight it gets, usually what is the temperature stays there, how quick you garden soil gets dried and at want temperature it happens quick?
then you might need a bigger pump and check the flow rate of the water.
Hope this info helps!
thanks for the info.
But a bigger pump…I need to know till what limit of output voltage the motor pump the nodeMCU will support.
You can connect an ac water pump as well and switch it using relay.
Hello, the water pump stays on no matter what the moisture reading says. Is there a way to fix this?
Hi Kevin,
As per the logic in the code the water pump will be on if the soil moisture in less than 30%.
Else it will be off.
how I can add switch on and off option?
Where do you want to add the switch?
Where is the battery and water pump in the connection?
It is present in connection diagram. Please refer
Do I need to change the code if I want the pump to also be manually opened using a switch widget?
If so, how and where specifically in the code?
is it alright if I change some Arduino codes? does it transfer automatically, the manual operation of the pump to the widget?
I can understand the Arduino codes but not the blynk codes as of yet.
Yes you have to change the code and add a switch widget as well.