Send DS18B20 Temperature Sensor data to ThingSpeak
Now a days we can monitor sensor data using many IoT platforms. In this article we will Send DS18B20 Temperature Sensor data to ThingSpeak using ESP8266 NodeMCU.
This project can help you to monitor multiple sensor data on same webpage. You an connect multiple sensors at you home in different locations and get the data easily.
Parts List
For building this project you need below materials. You can click on the best buy Affiliate links which will help this blog.
- DS18B20 Temperature Sensor x 1 (Best Buy)
- ESP8266 NodeMCU WIFI Module x 1 (Best Buy)
- Resistor 4.7KΩ 1/4w x 1
- Breadboard (Best Buy)
- Jumper cables (Best Buy)
DS18B20 Temperature Sensor
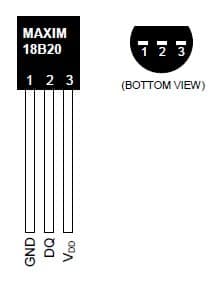
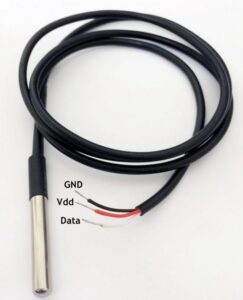
DS18B20 is a 1-wire programmable Temperature sensor. This is manufactured by maxim integrated. This sensor is widely used to measure temperature in harsh environments and can be interfaced easily. The sensor built quality is good. There is a waterproof version is also available which make this sensor to be mounted quickly and easily.
The temperature measuring range is starts form -55°C to +125°. It has a accuracy of ±5°C. Each sensor has a unique address and needs only one GPIO pin for interfacing and sending data. Its a good sensor for measuring temperature at multiple points without using much of your digital pins on the microcontroller.
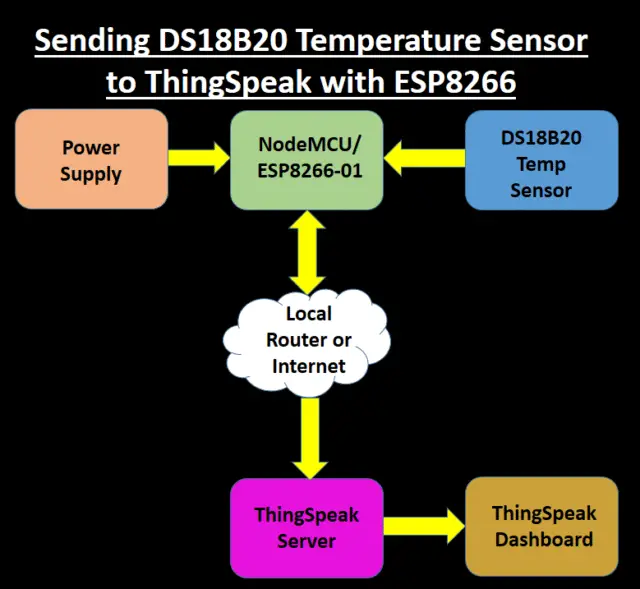
How it Works?
Here the temperature sensor collects the temperature data and sends it to ThingSpeak platform using NodeMCU. The data is sent over an interval of 15 seconds. For free version in ThingSpeak 15 sec is the minimum time which can be set to get the data from a hardware.
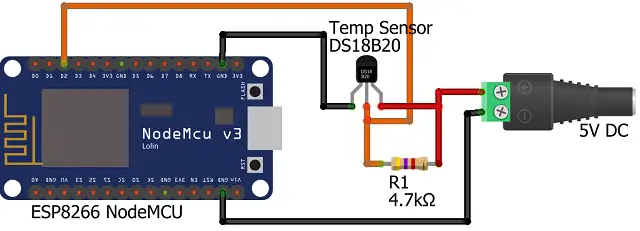
Circuit Diagram
The connection is simple and easy. You can also use WeMOS D1 Mini, ESP32 or ESP8266-01 wifi module replacing NodeMCU.
Must Read:
- IoT based Timer Switch using Blynk and NodeMCU
- ESP32 based Switch Notification Project using Blynk
- How to read DHT11 sensor data using Blynk
- Interfacing LM35 Temp Sensor with Arduino
- DS18B20 with NodeMCU Local WebServer
ThingSpeak Setup
Setting up and account in ThingSpeak is easy. You need to register with an email id and your account will be created.
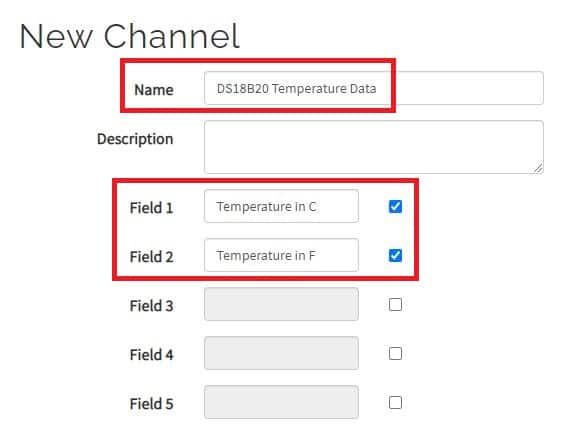
After creating your account Login and click on New Channel

Provide a name for your channel and select 2 Field. One for showing the temperature in Degree Centigrade and other in Fahrenheit.
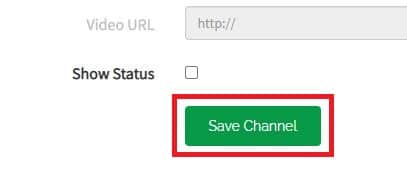
Then click on Save Channel.
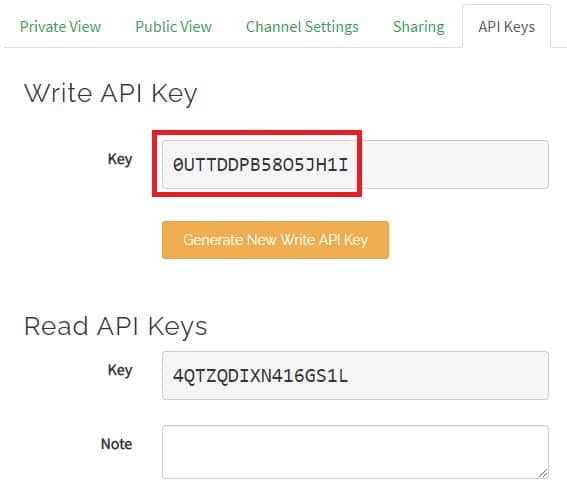
Once your channel is created, go to API Keys
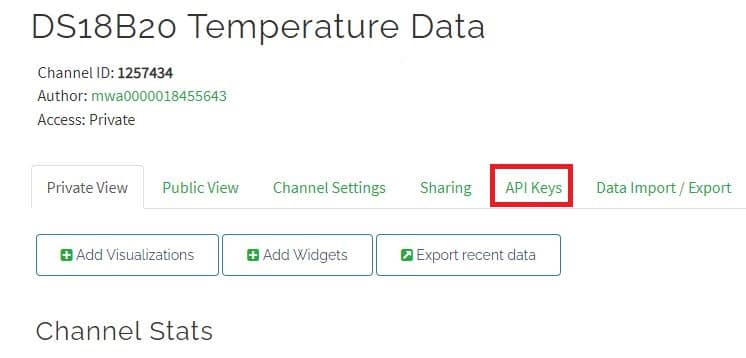
Now you will see Write API Key. This is required to send the data to this channel and this api key will act as a authentication token. Copy the Write API Key and paste it in you Arduino code.
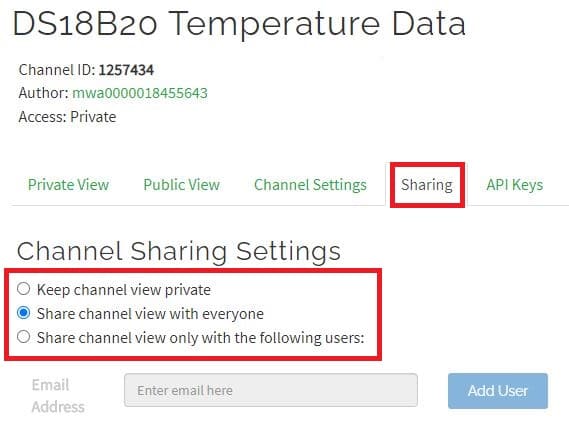
You can also share the sensor data publicly or customize it for sharing as shown below.
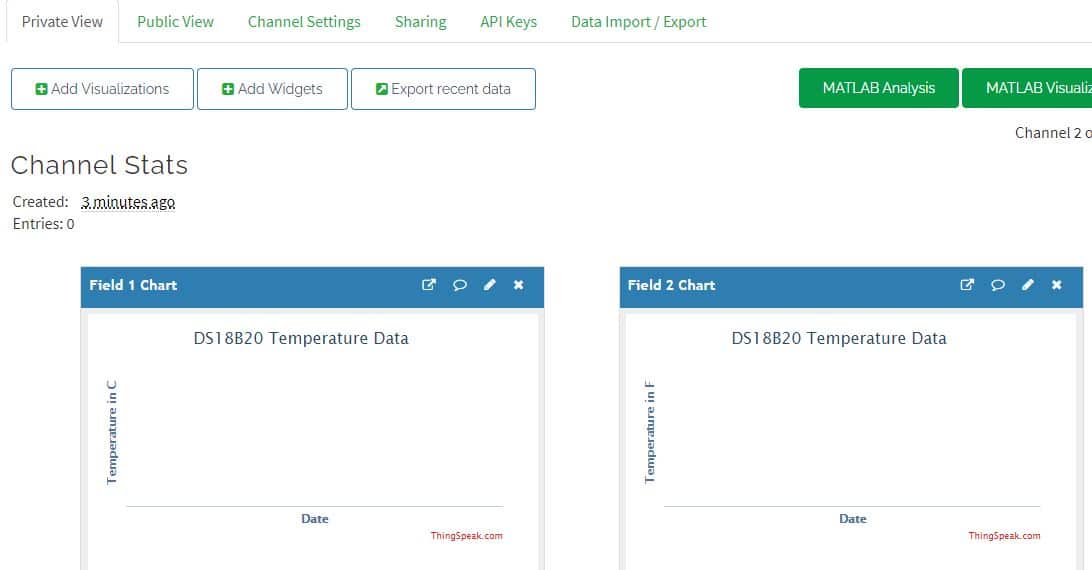
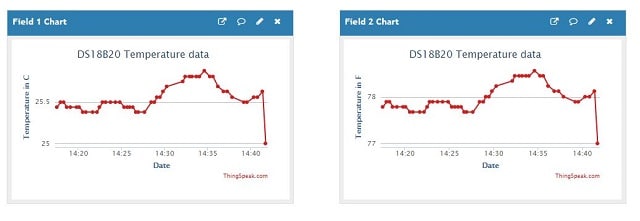
After all these settings you will get 2 Charts for displaying the sensor data. Now the ThingSpeak configuration is complete.
Arduino Libraries
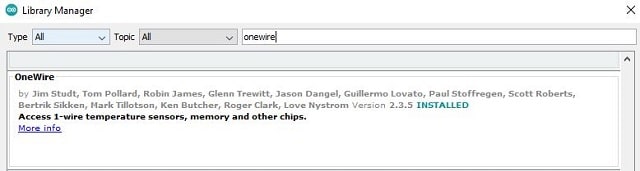
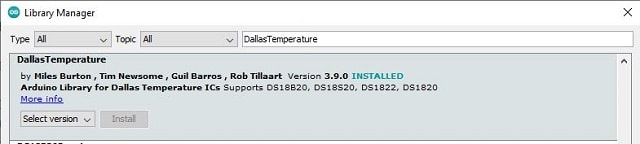
Before you compile the code, you need to install below libraries. You can got to
SKETCH -> Include Library -> Manage Libraries
Search for Onewire and Dallas temperature as shown. Once you get them, install one by one.
Uploading the Code
The code is simple and easy to understand. You need to change the API key along with wifi name and password. You can copy paste the below code and compile it in Arduino IDE.
For uploading the code you can use below methods based on the wifi module you have selected.
#include <ESP8266WiFi.h>
#include <OneWire.h>
#include <DallasTemperature.h>

String apiKey = "API key"; // Enter your Write API key from ThingSpeak

const char *ssid = "wifi ssid"; // Replace with your wifi ssid and WPA2 key
const char *pass = "Wifi_Password";
const char* server = "api.thingspeak.com";

#define ONE_WIRE_BUS 4 // Data wire is connected to GPIO 4 i.e. D2 pin of nodemcu

OneWire oneWire(ONE_WIRE_BUS); // Setup a oneWire instance to communicate with any OneWire devices

DallasTemperature sensors(&oneWire); // Pass our oneWire reference to Dallas Temperature sensor

WiFiClient client;

void setup()
{
Serial.begin(9600);
delay(10);

Serial.println("Connecting to ");
Serial.println(ssid);
WiFi.begin(ssid, pass);

while (WiFi.status() != WL_CONNECTED)
{
delay(500);
Serial.print(".");
}
Serial.println("");
Serial.println("WiFi connected");

}

void loop()
{
sensors.requestTemperatures();
float tempC = sensors.getTempCByIndex(0);
float tempF = sensors.getTempFByIndex(0);
if ((tempC == -127.00) || (tempF == -196))
{
Serial.println("Failed to read from sensor!");
delay(1000);
}
else
{
Serial.print("Temperature in Celsius: ");
Serial.println(tempC);
Serial.print("Temperature in Fahrenheit: ");
Serial.println(tempF);
delay(1000);
}

if (client.connect(server,80)) //184.106.153.149 or api.thingspeak.com
{
String postStr = apiKey;
postStr +="&field1=";
postStr += String(tempC);
postStr +="&field2=";
postStr += String(tempF);
postStr += "\r\n\r\n";

client.print("POST /update HTTP/1.1\n");
client.print("Host: api.thingspeak.com\n");
client.print("Connection: close\n");
client.print("X-THINGSPEAKAPIKEY: "+apiKey+"\n");
client.print("Content-Type: application/x-www-form-urlencoded\n");
client.print("Content-Length: ");
client.print(postStr.length());
client.print("\n\n");
client.print(postStr);
Serial.println("Sent data to Thingspeak");
}
client.stop();
Serial.println("Delay of 15 Sec");
// thingspeak needs minimum 15 sec delay between updates
delay(5000);
}
Construction & Testing
Now we have connected the components as per the circuit diagram and powered it using USB. You can use a external power supply of 5V to power this entire circuit.
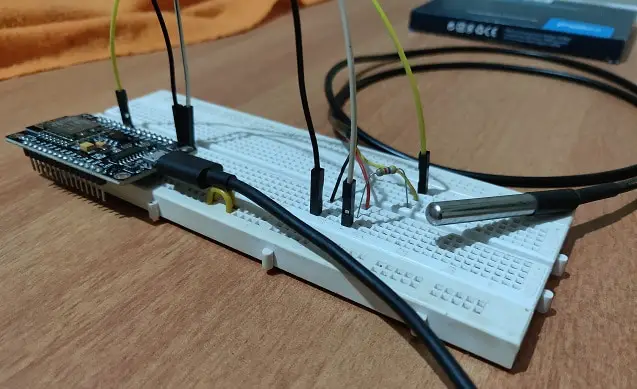
Once connected the output will be something like this.
Conclusion
Finally you will learn how to Send DS18B20 Temperature Sensor data to ThingSpeak using NodeMCU or ESP8266-01 wifi module. Through this article you will learn to interface you IoT hardware with a public IoT platform and sending data over internet.
Not working!
Please check the connections again.
The code is working and showing the values in serial monitor. But the Thingspeak is only getting the initial value and the value is not updating with time. It only showing one initial temperature value in the Thingspeak. Could you provide any solution to this problem?
Please check the connectivity and in free plan the updates are done in every 15 seconds.