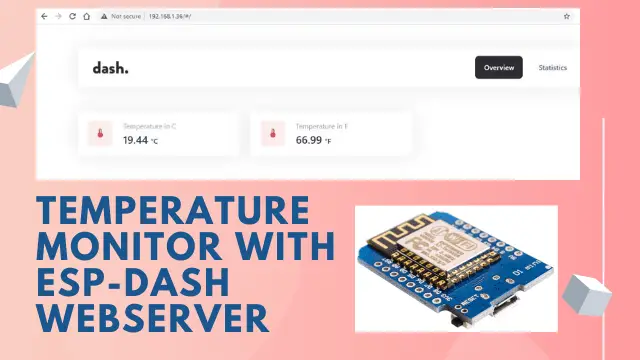
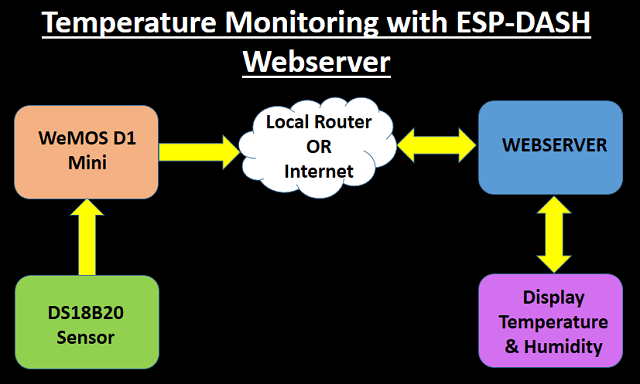
Temperature Monitoring with ESP-DASH Webserver
Ambient temperature measurement can be performed with different sensors and scenarios. We use the ESP-Dash library to display graphics and Real-time in this project. Using the Ds18b20 sensor as well as the Wemos board, which uses the ESP8266 Wi-Fi chip, we will monitor the temperature graphically with ESP-Dash . We will also be able to increase the number of temperature sensors and monitor them simultaneously if needed. This tutorial teaches you about Temperature Monitoring with ESP-DASH Webserver. Also how to set up a web server as well as an IoT dashboard for temperature monitoring in the fastest and easiest way. In addition to being quick to set up, this library is optimally designed so you can safely monitor data through a web server created with esp-dash.
Materials Needed
- DS18B20 Temperature Sensor (Best Buy) x 1
- WeMOS D1 Mini (Best Buy) x 1
- Resistor 4.7KΩ x 1
- Jumper cables (BEST BUY) x 1
- Breadboard (Best Buy) x 1
Temperature Sensor DS18B20
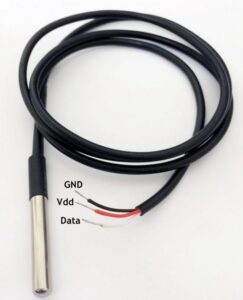
Sensors are designed and manufactured in different types with different uses. OneWire sensors are widely used in a variety of industries. The DS18B20 sensor, although it has three wires, is in the category of OneWire. This is because the sensor transmits all the information with just OneWire and multiple sensors can communicate with a single microcontroller base. Temperature sensor Ds18b20 with a temperature measurement range between +125 to -55 ° C and operating voltage of 5 volts is one of the most widely used sensors in the field of temperature setting. An important feature of this sensor is the ability to send data from a single pin. Then, using the 64-bit code specific to each sensor, their values can be measured from a single input in the microcontroller. In other words, it is possible to connect several DS18b20 sensors simultaneously from one base.
ESP-DASH
It is a platform for building user interfaces based on ESP boards. ESP-DASH is a C ++ based library build for Arduino IDE. It is used for creating multi functional and real-time dashboards using ESP8266 and ESP32 development boards. Using the functions makes it easy for you to use this library and allows you to create a responsive dashboard that is accessible via the module IP address. This library will allow the user to set up a web server using predefined functions, as well as a dashboard with graphical plugins to monitor values. You will be able to change the display of these values depending on the type of input data.
WeMOS D1 Mini
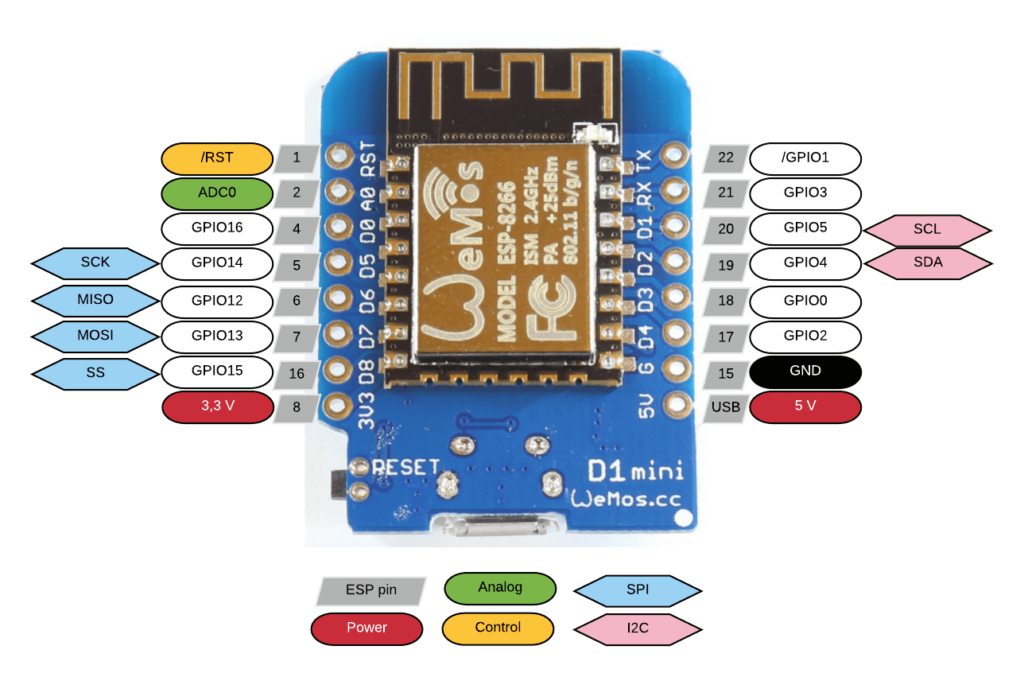
WeMos D1 mini board is one of the most popular development boards used in the field of IoT. The advantages of this board compared to other development Wi-Fi boards such as Node MCU is its small size. It is equipped with a ESP8266 Wi-Fi chip. Another advantage of this board is the existence of different shields for this board, which makes any project very easy and enjoyable for the user. Shields such as battery shield, multi sensor, DHT22, relay, OLED display etc. are available. There are many other shields been developed for this board, which will leave you with a good IoT experience.
Working
In this tutorial, we will first build a web server using ESP-Dash. Then we will add two cards to our web server environment. Analyze the output values of the ds18b20 sensor and send it to the web server to be displayed on the web page. Next, using the Arduino IDE software serial monitor, we will be able to obtain the IP required to access the web page.
Required Arduino Library
You need below libraries for the code to work properly. You can download them one by one. If you have already installed them then you may ignore to install them again.
Open Arduino IDE and locate Sketch > Include Library > Manage Libraries
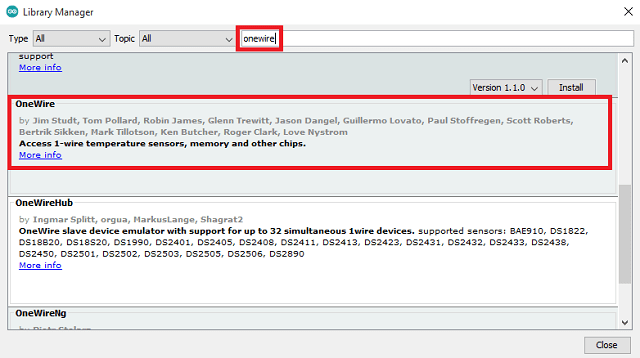
OneWire
Type OneWire as shown below and install the library.
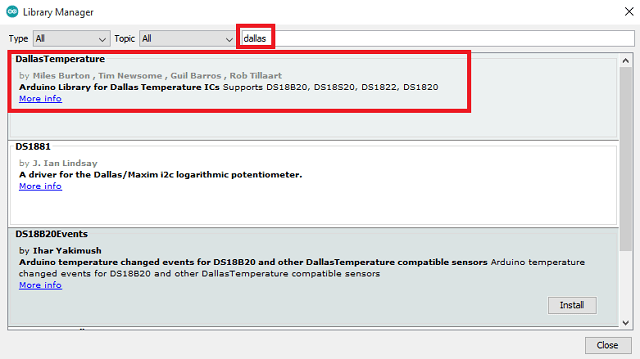
Dallas
Search for Dallas and install the highlighted library.
ESP-Dash
You can install the ESP-Dash library from git hub as a package by this link. You can directly download it in Arduino IDE using library manager by searching esp-dash.

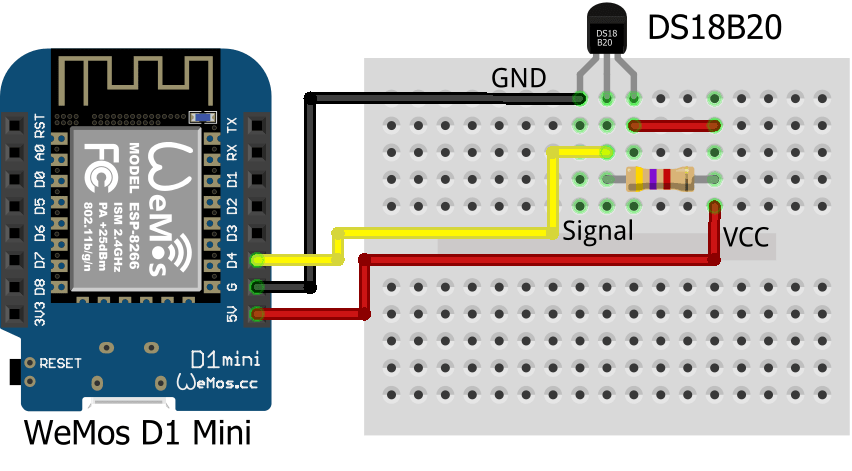
Connection Diagram
In this part of the project, we will make connections between the Ds180b20 temperature sensor and the Wemos D1 board. Since the main chip is ESP8266, so we can use nodemcu boards if needed to start. Make the connections according to the schematic below.
Code Analysis
In the second part of the commissioning, it is the turn of the project codes, which we will first examine the important parts of. Launch ESP.DASH and monitor the data already obtained. We have specified the pin related to reading the sensor data. In this scenario, we have specified the value 2, which means GPIO2, which is the D4 pin driver in the standard board.
#define ONE_WIRE_BUS 2
In this section, we will introduce the desired Wi-Fi network by entering the ssid and password.
const char* ssid = "Your WiFi SSID";

const char* password = "Your Wifi Password";
Below line of code will start the webserver and attach ESP-DASH to webserver
/* Start Webserver */
AsyncWebServer server(80);
/* Attach ESP-DASH to AsyncWebServer */
ESPDash dashboard(&server);
In these four lines, we specify the graphically displayable values for the x and y axes in the web page.
Card tempC(&dashboard, TEMPERATURE_CARD, "Temperature in C", "°C");

Card tempF(&dashboard, TEMPERATURE_CARD, "Temperature in F", "°F");
Finally, we use the following lines to update and send the data from sensor to dashboard based on Celsius and Fahrenheit.
/* Update Card Values */
tempC.update(temperatureC,"°C");
tempF.update(temperatureF,"°F");
/* Send Updates to our Dashboard (realtime) */
dashboard.sendUpdates();
Complete Code
You can download the zip file from the below link and unzip it. Open the code using Arduino IDE. Update the network details in the code and select the board. Click on upload. You can refer to this article on How to upload a code in WeMOS D1 Mini. Temperature Monitoring with ESP-DASH Webserver code is built for both ESP8266 and ESP32. Just change the pin details.

Some more Projects:
- DHT11 based Temperature Humidity Monitoring IoT Project
- Telegram NodeMCU based Home Automation
- NodeMCU Blynk Feedback Switch with Physical Switch Status
- ESP32 / NodeMCU based Web Server with Physical Switch Feedback
- Low Cost Local Blynk Server for IoT Projects
- IoT Project using Local Blynk Server
- ESP32 Cam code upload using Arduino Uno
- NodeMCU ESP8266 IoT based LPG Gas Leakage Alarm
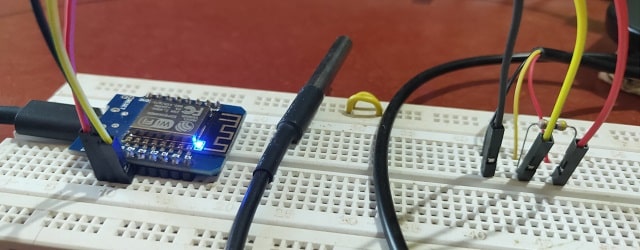
Construction & Testing
We have connected the components as per the connection diagram and uploaded the code.
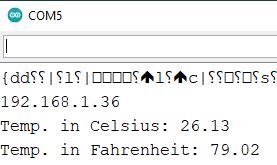
Open Arduino IDE and launch Serial monitor. Reset the WeMos D1 Mini board, it will show you the IP and the corresponding temperature.
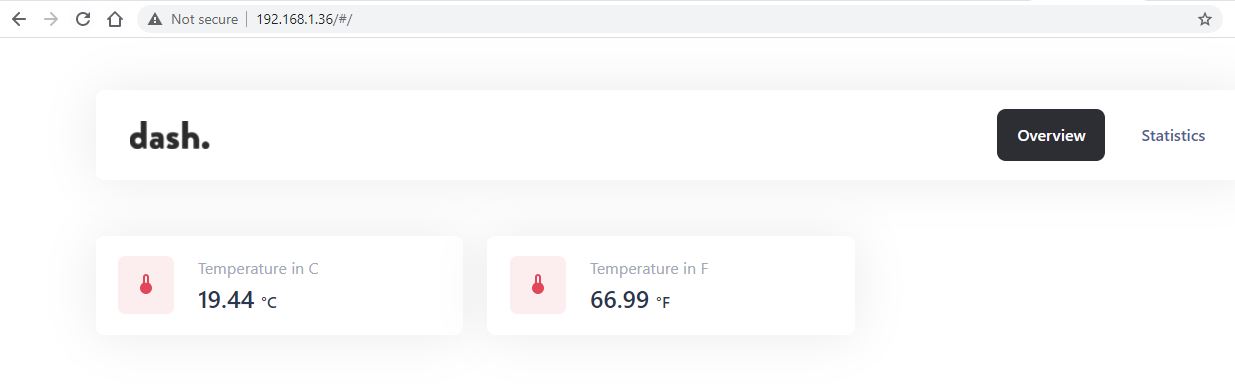
Now use that IP address to launch the webserver from any browser (Preferably Chrome or Firefox). You will be able to see the live temperature using ESP-DASH.
Conclusion
Finally, using ESP-DASH, which is a library to set up a web server for data monitoring as easily and quickly as possible, we were able to launch another project. You can also use this code and change values to create different data with Set up a simple web server monitor. Finally, we can call esp-dash an optimal library for applications such as data monitoring on the web server with the ability to build a fully graphical dashboard. With the functions defined in this library will be able to set up a web server and dashboard with a beautiful appearance and function properly.